Stop spreading germs with dirty microfiber cloths! This guide shows you exactly how to disinfect microfiber cloths safely and effectively, preserving their cleaning power. You’ll learn washing methods, safe disinfectants, drying tips, and when to replace them for a truly germ-free home.
Key Takeaways
- Wash before disinfecting: Always remove dirt and grime first with a regular wash cycle using hot water and detergent.
- Avoid fabric softeners & dryer sheets: These coat fibers, reducing absorbency and trapping germs instead of killing them.
- Use heat or approved disinfectants: High-heat drying or specific solutions like diluted bleach or vinegar effectively kill bacteria and viruses.
- Never mix chemicals: Combining bleach with vinegar or ammonia creates dangerous toxic fumes – use one method at a time.
- Replace when worn: Cloths lose effectiveness when fibers break down; replace them once they feel rough or don’t pick up dirt well.
- Store clean & dry: Keep disinfected cloths in a clean, dry container to prevent recontamination before use.
Why Disinfecting Microfiber Cloths is Non-Negotiable (And How to Do It Right)
You love your microfiber cloths. They streak-free clean windows, lift grime from countertops, and polish electronics like magic. But here’s the dirty secret: if you’re not disinfecting them properly, you’re just moving germs around your home. Microfiber’s super-absorbent fibers trap bacteria, viruses, and allergens incredibly well. Without proper disinfection, that cloth wiping your kitchen counter after raw chicken prep could be spreading salmonella to your cutting board. Yikes!
This guide cuts through the confusion. Forget guesswork and outdated advice. We’ll show you exactly how to disinfect microfiber cloths to kill harmful pathogens while protecting the delicate fibers that make them so effective. You’ll learn safe methods, avoid common mistakes that ruin your cloths, and keep your home truly clean. Let’s stop the germ cycle today!
Understanding Microfiber: Why Standard Cleaning Isn’t Enough
Microfiber isn’t just regular cloth. It’s made from ultra-fine synthetic fibers (usually polyester and polyamide) split into microscopic hooks. This structure gives it incredible absorbency and the ability to grab tiny particles – including germs. However, this same structure means:
Visual guide about Disinfect microfiber cloths properly stop germs today
Image source: prudentreviews.com
- Germs cling tightly: Bacteria and viruses get trapped deep within the split fibers.
- Residue builds up: Oils, dead skin cells, and cleaning product residues coat the fibers over time.
- Heat sensitivity: Very high heat can melt or damage the fine fibers, reducing effectiveness.
Simply rinsing a microfiber cloth or washing it with cold water and detergent removes surface dirt but does not reliably kill germs. Disinfection requires either sufficient heat or a chemical agent proven to destroy pathogens. Skipping this step turns your favorite cleaning tool into a germ taxi. Proper disinfection ensures your cloths are truly clean and safe for your next task.
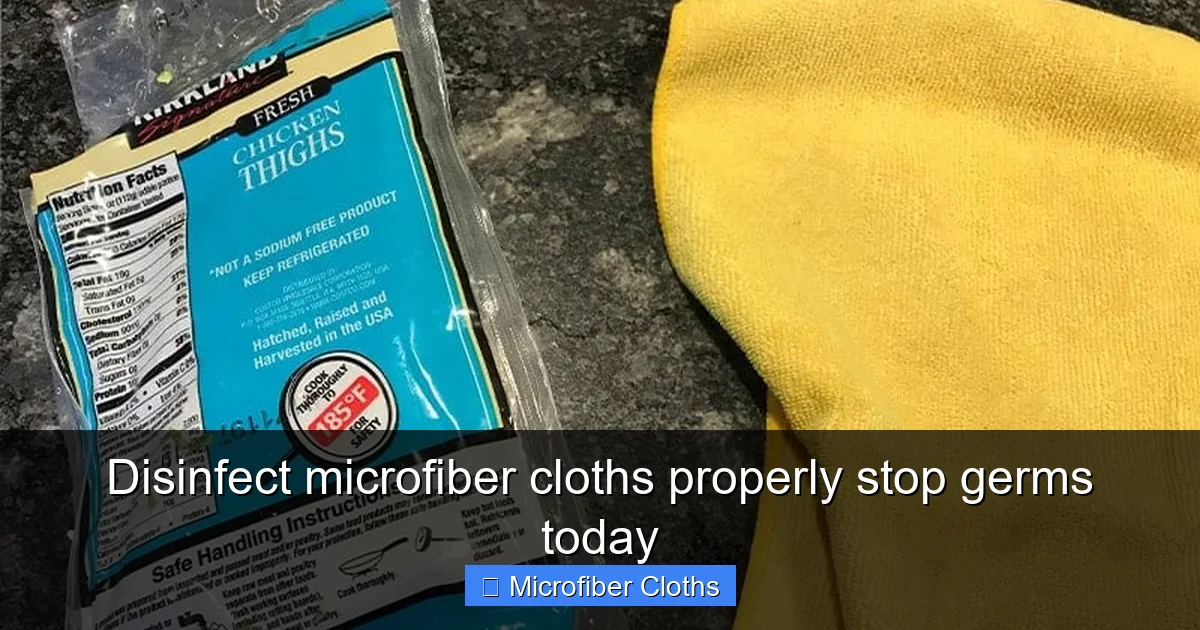
Step 1: Pre-Wash – Removing Dirt Before Disinfection
You must clean off visible dirt and grime before attempting to disinfect. Disinfectants work best on relatively clean surfaces. Trying to disinfect a cloth caked in dried-on food or grease is ineffective.
Visual guide about Disinfect microfiber cloths properly stop germs today
Image source: prudentreviews.com
Gather Your Supplies
- Used microfiber cloths
- Laundry detergent (liquid preferred)
- Washing machine
- Optional: Stain remover (for tough spots)
The Washing Process
- Shake out loose debris: Give cloths a good shake outdoors to remove dust, hair, or crumbs.
- Pre-treat stains (if needed): Apply a small amount of liquid detergent or stain remover directly to stubborn spots. Gently rub the fabric together. Don’t soak.
- Wash separately (highly recommended): Never wash microfiber with cotton towels or clothing. Lint from other fabrics clings to microfiber, ruining its effectiveness. Wash microfiber cloths with other microfiber items only.
- Use hot water (140°F/60°C or higher): Hot water is crucial for breaking down oils and loosening embedded dirt. Check your machine’s settings – “Hot” or “Sanitary” cycles are ideal. *Note: Some very delicate microfiber (e.g., for optics) may require warm water; check care labels.*
- Add detergent: Use your regular amount of liquid detergent. Avoid powder detergents if possible, as they can leave residue in microfiber fibers.
- Skip the fabric softener: This is critical! Fabric softener coats microfiber fibers, making them hydrophobic (water-repelling) and drastically reducing absorbency. It also traps dirt and germs. Never use fabric softener or dryer sheets with microfiber.
- Run a full cycle: Select a regular or heavy-duty cycle to ensure thorough cleaning.
This pre-wash removes the bulk of soil, preparing the cloth for effective disinfection. Think of it as cleaning the canvas before applying the disinfectant “paint.”
Step 2: Choosing & Applying the Right Disinfection Method
Now for the germ-killing part! You have several safe and effective options. Choose based on what you have and the level of disinfection needed (e.g., after cleaning a sickroom vs. regular kitchen use).
Visual guide about Disinfect microfiber cloths properly stop germs today
Image source: prudentreviews.com
Method 1: High-Heat Drying (Most Accessible & Recommended)
This is often the simplest and most effective method for everyday disinfection, leveraging your dryer’s heat.
How to Do It
- Transfer wet cloths to dryer: Immediately after the wash cycle ends, move the damp cloths to the dryer. Don’t let them sit damp in the washer.
- Use the highest heat setting safe for the cloth: Select “High” or “Sanitary” heat. Most standard microfiber cloths can handle this. *Exception: Cloths labeled “Do Not Tumble Dry” or for delicate surfaces (like camera lenses) – air dry these instead (see Method 3).*
- Dry completely: Run the dryer for a full cycle (usually 45-60 minutes). Ensure cloths are 100% dry to the touch. Dampness breeds mold.
- Why it works: sustained high heat (typically above 140°F/60°C for several minutes) reliably kills most common bacteria and viruses. It’s chemical-free and preserves fiber integrity.
Method 2: Diluted Bleach Solution (For Heavy-Duty Disinfection)
Use this for cloths that contacted bodily fluids, sick individuals, or raw meat. Never use undiluted bleach! It damages fibers.
How to Do It
- Prepare the solution: In a well-ventilated area, mix 1/3 cup (80ml) of standard household bleach (5-9% sodium hypochlorite) with 1 gallon (3.8L) of COLD water. Always add bleach to water, never water to bleach.
- Soak cloths: Submerge pre-washed, damp cloths in the solution for exactly 5 minutes. Do not exceed this time, as prolonged exposure weakens fibers.
- Rinse thoroughly: Remove cloths and rinse them under cold running water until the water runs clear and you no longer smell bleach. This step is vital to remove chemical residue.
- Dry completely: Proceed to high-heat drying (Method 1) or air drying (Method 3).
- Critical Safety: Wear gloves. Never mix bleach with vinegar, ammonia, or other cleaners – this creates deadly chlorine gas. Use only in well-ventilated areas.
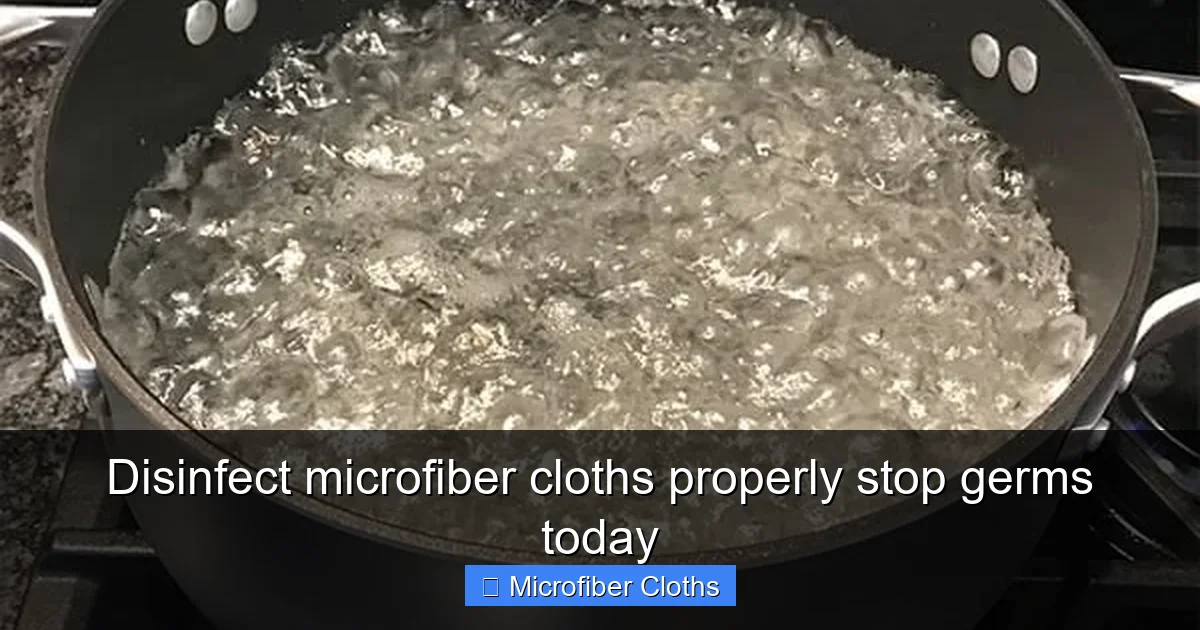
Method 3: White Vinegar Solution (Gentler Alternative)
A good option for regular maintenance or if you prefer to avoid bleach. While vinegar has some antimicrobial properties, it’s less potent than bleach or high heat against certain pathogens. Best combined with hot water washing.
How to Do It
- Prepare the solution: Mix 1 part white distilled vinegar with 3 parts HOT water (e.g., 1 cup vinegar to 3 cups water).
- Soak or add to rinse cycle: You can either:
- Soak pre-washed cloths in the solution for 10-15 minutes, then rinse well and dry.
- Add 1/2 cup vinegar to the washing machine’s rinse cycle dispenser (after the main wash with detergent).
- Rinse well (if soaking): Ensure no vinegar smell remains before drying.
- Dry completely: Use high-heat drying for best disinfection boost.
Important: Vinegar alone isn’t a hospital-grade disinfectant. Its primary role here is to help break down mineral deposits and odors, and its mild acidity aids in killing some germs, especially when combined with hot water washing and drying.
Step 3: Drying – The Final Germ-Killing Step
How you dry your cloths is just as important as washing and disinfecting. Damp microfiber is a breeding ground for mold and bacteria.
Best Practice: High-Heat Tumble Drying
- Why it’s best: The sustained high heat (as used in Step 2, Method 1) is a powerful disinfectant and ensures complete dryness.
- How: Use the “High” or “Sanitary” heat setting. Dry until completely dry (no damp spots).
- Tip: Add a clean, dry towel to the load to help absorb moisture and speed up drying.
Air Drying (When Necessary)
- When to use: Only for cloths labeled “Do Not Tumble Dry” (e.g., some lens cloths) or if you lack a dryer.
- How to do it safely:
- Lay cloths flat on a clean, dry rack or hang them over a clean rod.
- Ensure good air circulation – place near a fan or open window.
- Keep them away from direct sunlight for prolonged periods, which can degrade some microfiber over time.
- Crucial: Air-dried cloths must be 100% dry before storage. This can take 24+ hours. Dampness = mold.
Never leave damp microfiber balled up in a hamper or on a counter. This guarantees bacterial growth.
Step 4: Storage – Keeping Your Disinfected Cloths Clean
Proper storage prevents recontamination before your next use.
- Store only when completely dry: Any moisture invites mold.
- Use clean containers: Fold cloths neatly and store them in a clean, dry basket, drawer, or sealed container (like a plastic bin with a lid). Avoid open baskets where dust can settle.
- Keep them separate: Store microfiber cloths away from used cloths or dirty cleaning tools.
- Label if needed: If you use different cloths for different tasks (e.g., kitchen vs. bathroom), label the storage container.
Storing clean, dry cloths properly ensures they’re ready to tackle your next cleaning job without introducing new germs.
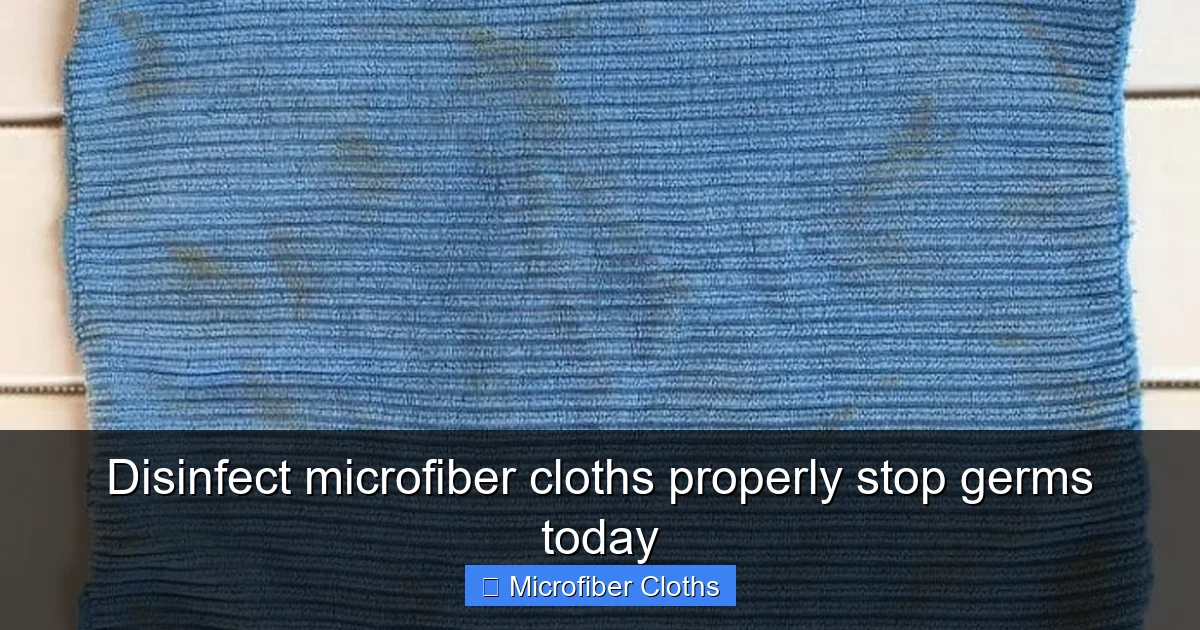
Troubleshooting Common Microfiber Disinfection Problems
Problem: Cloths Still Smell Musty or Dirty After Washing
- Cause: Inadequate rinsing, fabric softener residue, or washing in cold water.
- Solution: Rewash with hot water, extra detergent, and NO softener. Add 1/2 cup white vinegar to the rinse cycle. Ensure thorough rinsing. Dry on high heat.
Problem: Cloths Feel Stiff or Less Absorbent
- Cause: Fabric softener buildup, detergent residue, or mineral deposits (hard water).
- Solution: Rewash with hot water and a small amount of detergent. Add 1 cup white vinegar to the wash cycle to break down residues. Avoid softeners permanently. Consider a laundry stripping method (search online) for severe buildup.
Problem: Bleach Solution Damaged My Cloths
- Cause: Using too much bleach, soaking too long, or using hot water with bleach (which accelerates damage).
- Solution: Stick strictly to the 1/3 cup per gallon cold water ratio and 5-minute soak time. If damage occurs, the cloths are likely ruined – replace them. Prevention is key!
Problem: Cloths Aren’t Killing Germs Effectively
- Cause: Skipping the pre-wash, using cold water, insufficient drying heat/time, or using ineffective methods (like just vinegar without heat).
- Solution: Always pre-wash with hot water and detergent. For reliable disinfection, use high-heat drying OR the diluted bleach method correctly. Ensure cloths are bone dry.
When to Replace Your Microfiber Cloths (Don’t Disinfect the Unfixable!)
Even with perfect care, microfiber cloths wear out. Disinfecting won’t restore lost effectiveness. Replace cloths when you notice:
- Visible wear: Holes, thinning fabric, or frayed edges.
- Reduced performance: They don’t pick up dirt or water as well, leave streaks, or feel rough.
- Permanent odors: Smells persist after multiple proper washes and disinfection.
- Loss of color (for colored cloths): Significant fading often indicates fiber degradation.
Most quality microfiber cloths last 50-100 washes with proper care. Cheap cloths may wear out much faster. Investing in good cloths and caring for them properly saves money long-term.
Conclusion: Your Germ-Free Cleaning Powerhouse Awaits
Disinfecting your microfiber cloths isn’t complicated, but it is essential for a truly clean and healthy home. By following these steps – pre-washing with hot water and detergent, choosing the right disinfection method (high-heat drying is your best friend!), avoiding fabric softeners, drying completely, and storing properly – you transform your cloths from potential germ spreaders into powerful cleaning allies.
Remember, disinfect microfiber cloths properly means breaking the cycle of contamination. It protects your family from illness, extends the life of your cloths, and ensures every swipe actually cleans. Ditch the guesswork. Implement this routine today, and enjoy the peace of mind that comes with knowing your cleaning tools are as clean as the surfaces they touch. Your home – and your health – will thank you!
🎥 Related Video: Are You Washing Your Microfiber Towels Wrong?
📺 Clean That Up
Buy towels at my brand new store! https://shop.letscleanthatup.com/products/cleanthatup-custom-towel Read the blog here: …