
Smart bulbs stop working for a few common reasons, but you can fix most problems quickly by checking power, your network, and the app settings. If the bulb has power, check your Wi‑Fi band, app pairing, and firmware — those fixes solve most connection problems.
You might find the bulb offline because it’s on the wrong Wi‑Fi frequency, not in pairing mode, or the bulb’s firmware needs an update. Try power cycling the bulb, confirming the socket and switch work, and opening the bulb’s app to re-pair or update before calling support.
Key Takeaways
- Check power, socket, and basic app pairing first.
- Verify Wi‑Fi frequency, network strength, and device compatibility.
- Update firmware, app permissions, or contact support if problems persist.
Basic Troubleshooting Steps
Start with simple checks that take a minute or two. Verify power, confirm the bulb sits correctly, and try another socket to isolate the problem.
Verify Power Supply
Check the wall switch first. Make sure the switch is on and the fixture has power; if the switch controls multiple lights, test those too.
Look for a tripped breaker or blown fuse in your electrical panel. Reset the breaker or replace the fuse if needed, then test the bulb again.
If the bulb is in a lamp, confirm the lamp’s power cord is plugged in and the lamp’s switch works. For smart bulbs that require a smart hub, ensure the hub has power and its LED shows normal status.
If your home uses smart dimmer switches, remember many smart bulbs won’t work with certain dimmers. Temporarily replace the dimmer with a standard switch or test the bulb in a fixture with a simple on/off switch.
Check Bulb Installation
Turn off the power before you touch the bulb. Unscrew the bulb and inspect the base and socket for corrosion, dirt, or bent contacts.
Make sure the bulb is the correct type and wattage for the fixture. Some fixtures require specific base types (E26, GU10, etc.) or a max wattage that smart bulbs can exceed.
Screw the bulb in firmly but don’t overtighten. A loose connection can cause flicker or no power. For bayonet or twist-lock bulbs, align and lock according to the fixture’s design.
If the bulb has a removable trim or cover, ensure it’s seated correctly so the bulb can make full contact with the socket.
Test with a Different Socket
Move the bulb to a different lamp or ceiling socket that you know works. This quickly tells you if the bulb itself is bad.
If the bulb works in the other socket, the original fixture or wiring likely has the issue. Check that fixture’s wiring connections and switch, or consult an electrician if wiring looks damaged.
If the bulb still fails in a known-good socket, try a different bulb in that socket to confirm the socket works. If both bulbs fail, the problem may be a batch defect; contact the bulb manufacturer for warranty support.
Connectivity Issues
Weak Wi‑Fi, router settings, or a bulb that needs resetting cause most connection problems. Fixing signal range, checking router bands, and doing a proper bulb reset usually brings the light back online.
Wi-Fi Signal Strength
Your bulb needs a steady signal where it sits. If the bulb is more than 30–50 feet from the router, through walls or floors, the signal may drop enough to cause lag, flicker, or disconnects.
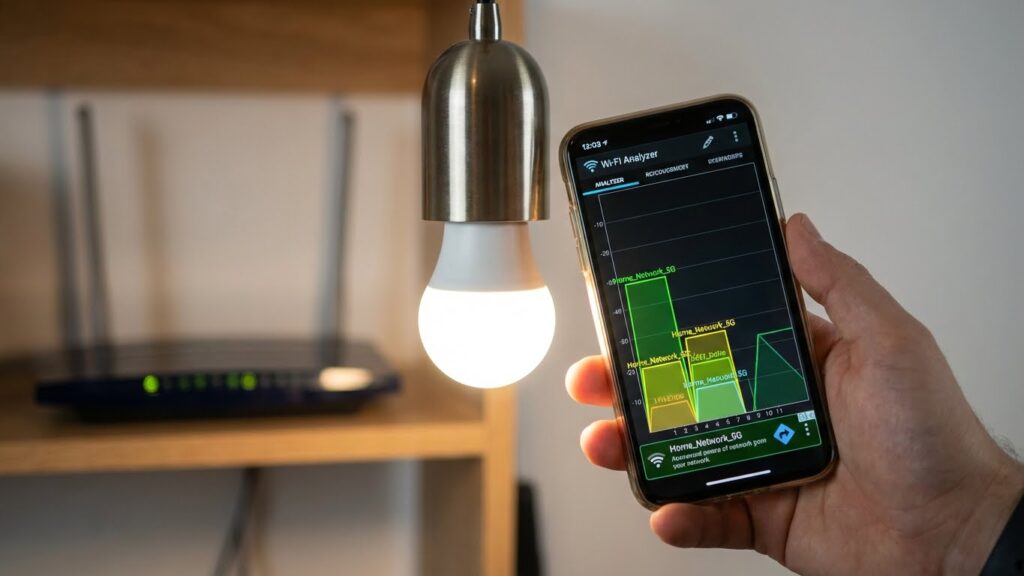
Check signal strength with a phone or a Wi‑Fi analyzer app at the bulb’s location. If RSSI or signal bars are low, move the bulb closer or move the router. One or two walls can be okay, but metal, concrete, and thick insulation cut signal sharply.
Improve coverage with a Wi‑Fi extender, mesh system, or by moving the router off the floor and away from other electronics. Avoid placing the router in a closet or behind a TV. If multiple devices share the same band, switch the bulb to a less crowded 2.4 GHz or 5 GHz band according to the bulb’s requirements.
Router Compatibility
Some bulbs only work on 2.4 GHz networks or require specific security settings. If your router is set to 5 GHz only, the bulb may never see the network during setup.
Log into your router and check wireless settings. Ensure SSID broadcast is enabled, WPA2 or WPA3 is used (avoid WEP), and no MAC filtering blocks the bulb. If your router uses a “Smart Connect” that merges bands, temporarily separate 2.4 GHz and 5 GHz SSIDs during setup.
If the router firmware is old, update it. Older firmware can cause device drops. Also check that the router’s DHCP range has free IP addresses; if the network has reached its device limit, the bulb won’t obtain an IP.
Resetting the Smart Bulb

Resetting clears bad settings and returns the bulb to factory mode for a clean setup. Different brands use different reset steps, so follow the bulb’s manual if available.
A common reset method: turn the bulb on for 5 seconds, off for 5 seconds, repeat 3–5 times until the bulb flashes. After the flash, use the app to add the bulb again. If that doesn’t work, power-cycle the fixture, reboot the router, then try the reset sequence again.
Keep the bulb within a few feet of the router during setup. If the app still won’t find the bulb, try a different phone on the same network or temporarily disable mobile hotspot/VPNs that might interfere.
App and Device Compatibility
Check that your phone and smart bulb support the same connection method, that your home hub or voice assistant accepts the bulb, and that the bulb’s app is up to date. These three things cause most failed connections.
Supported Mobile Devices
Confirm your phone’s OS and version first. Many bulbs require Android 8.0+ or iOS 13+; older systems may not run the bulb app or allow Bluetooth/Wi‑Fi pairing.
Check whether the bulb uses Bluetooth, Zigbee, or Wi‑Fi. If it needs Bluetooth, make sure your phone’s Bluetooth supports BLE (Bluetooth Low Energy). For Zigbee bulbs, you must use a compatible hub — a phone alone won’t work.
Look up the app’s device list in the app store page or the bulb manual before buying. If your phone is a heavily customized model (some international builds), the app may behave oddly. Install the official app from Google Play or the App Store; avoid unofficial or modified versions.
Smart Home Platform Integration
Decide which platform you want: Alexa, Google Home, Apple HomeKit, or a local hub like Samsung SmartThings. Not every bulb supports every platform. For HomeKit, bulbs often require an MFi code or a specific firmware build.
If you plan to use a hub (Zigbee/Z‑Wave), verify the hub’s supported device list and pairing steps. Some bulbs need pairing through the hub’s app first, not the bulb maker’s app. When linking accounts (for voice control), grant the app the specific permissions it requests — location for Bluetooth scanning or local network access for Wi‑Fi bulbs.
App Version and Updates
Always run the latest app version. Developers fix pairing bugs and add device compatibility in updates. Check the app store for updates and read the changelog for connectivity fixes.
Also update the bulb firmware when available. The bulb app usually shows a firmware update option after pairing, but some require a manual check in settings. If pairing fails repeatedly, uninstall and reinstall the app, reboot your phone, and try pairing again. Keep one bulb powered and near the router during updates to avoid interruptions.
Network Configuration Problems
Network settings often block smart bulbs from joining or staying on your Wi‑Fi. Check the band your router uses, any MAC filtering rules, and recent changes to SSID or password before trying other fixes.
2.4GHz vs 5GHz Wi-Fi Networks
Many smart bulbs only support 2.4GHz Wi‑Fi. If your phone or router is on 5GHz during setup, the bulb may not see the network. Confirm the bulb’s specs in the manual or app and switch your phone to the 2.4GHz SSID when adding the device.
If your router broadcasts a single SSID for both bands, create a separate 2.4GHz network or temporarily disable 5GHz to force devices onto 2.4GHz. Keep in mind 2.4GHz has longer range but more interference; place the bulb where the signal is strong.
After setup, you can leave both bands active if the bulb stays connected. If it drops often, try moving the router or adding a Wi‑Fi extender that supports 2.4GHz.
MAC Address Filtering
MAC filtering blocks devices not on an allowed list. If your router uses MAC filtering, the bulb won’t connect unless you add its MAC address. Find the bulb’s MAC in the packaging, on the device label, or inside the bulb’s app during setup.
To add the MAC address, log into your router’s admin page, locate the MAC filter or access control section, and add the bulb’s MAC as an allowed device. If you can’t find the MAC, temporarily disable MAC filtering to complete setup, then re-enable it with the bulb listed.
Be cautious: MAC filtering adds little true security and can make troubleshooting harder. Use a strong Wi‑Fi password and WPA2/WPA3 encryption instead.
Changing Network Settings
Changing SSID or Wi‑Fi password will disconnect smart bulbs. If you rename your network or update the password, reconfigure each bulb in its app with the new credentials. Many apps have a “reset network” or “reconnect” option to simplify this.
Avoid frequent router firmware updates or advanced setting changes during setup. If you changed DHCP ranges, VLANs, or guest network rules, ensure bulbs are on the main network and allowed to access the router and the internet. Static IP assignments can help stable connections but assign them carefully to avoid IP conflicts.
If you must factory reset a bulb, follow the manufacturer’s reset steps before attempting a fresh setup on the corrected network.
Firmware and Software Updates
Keep your bulb’s firmware and the controlling app up to date. Updates fix bugs, add features, and restore compatibility with your hub or Wi‑Fi.
Updating Bulb Firmware
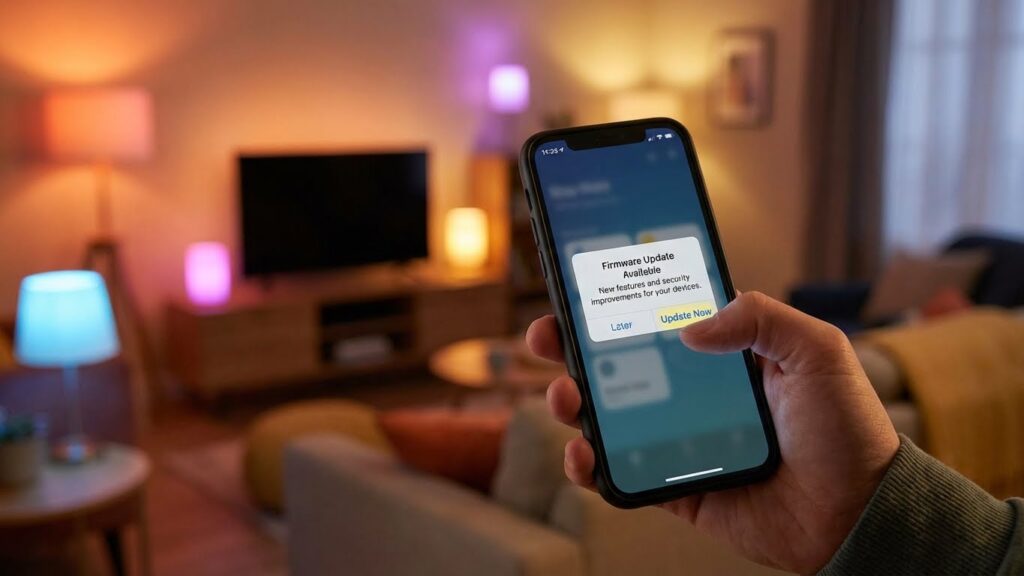
Check the bulb’s firmware version in the manufacturer app first. Open the app, select the bulb, and look for a “Firmware” or “Device Info” screen. Note the version number and any available update prompts.
If an update is available, plug the bulb into a stable socket and keep power on during the process. Use the app to start the update and do not toggle the switch or move out of Bluetooth/Wi‑Fi range until it finishes. For bulbs that update via a hub, ensure the hub has internet access and its firmware is current.
If the app shows no updates but you suspect an older version, visit the manufacturer’s support page for manual update instructions or contact support for a forced update file.
Resolving Update Failures
If the update fails, restart the bulb and your router first. Power‑cycle the bulb by switching it off for 10 seconds, then back on. Reboot your phone or hub and try the update again.
Check network factors: use a 2.4 GHz Wi‑Fi band if required, and move the phone closer to the bulb or hub. Disable VPNs and firewall settings that may block the update. If the app reports corruption or the bulb becomes unresponsive, perform a factory reset per the manual, then re-add the bulb and retry the firmware install.
If problems continue, record the error message and contact manufacturer support. Provide the bulb model, current firmware version, app version, and steps you already tried.
Account and Permissions Issues
Check your app account, device permissions, and any linked cloud service. Problems often happen when the app can’t access location, local network, or when your account is signed out or blocked.
Managing User Accounts
Make sure you’re signed into the correct account for the bulb’s app. If you have multiple emails or profiles, sign out and sign back in with the account used when you first set up the bulb. Check the app’s account page for linked devices and confirm the bulb appears there.
Verify permissions on your phone or tablet. On iOS, allow Local Network and Bluetooth if the app requests them. On Android, allow Location and Nearby Devices where needed. Denied permissions often stop discovery and pairing.
If the bulb was shared from another account, confirm the owner’s sharing settings. Revoke and re-share access if the bulb doesn’t appear. Also check for account locks or two-factor prompts that might block remote control.
Cloud Service Status
Many bulbs rely on a cloud service to enable remote control, routines, and voice assistant links. Visit the manufacturer’s status page or their Twitter/X feed to check outages. If the cloud is down, local control may still work but remote features will not.
Confirm your app shows a green or connected status for the cloud. If it shows an authentication error, re-enter your credentials and, if offered, refresh the OAuth permissions for voice assistants like Alexa or Google Home.
If you see frequent cloud disruptions, consider using local control options (LAN mode, local API) if your bulb and app support them. That reduces dependence on the vendor cloud and keeps basic functions working during outages.
Physical and Environmental Factors
High temperature, poor airflow, and the wrong fixture or socket can stop a smart bulb from working. Check the bulb’s temperature rating and the fixture type, and make sure air can move around the bulb.
Heat and Ventilation
Smart bulbs generate heat and need space to cool. If you install a bulb in an enclosed fixture—like a recessed can or a fully covered lantern—the bulb can overheat. Overheating may cause the bulb to dim, flicker, shut down, or shorten its lifespan.
Look at the bulb’s packaging or specs for the maximum operating temperature and whether it is rated for enclosed fixtures. If the fixture is enclosed and the bulb is not rated for that use, move the bulb to an open fixture or replace it with an enclosed-fixture rated smart bulb.
Ensure nearby heat sources aren’t raising the temperature. Avoid placing bulbs close to ovens, heat registers, or direct sunlight inside a glass shade. Also check that vents or fans aren’t blocked so normal airflow can carry heat away.
Light Fixture Compatibility
Not all fixtures work with smart bulbs. Some fixtures cut power when the switch is off or use dimmer wiring that conflicts with the bulb’s electronics. This can stop the bulb from pairing, make it flicker, or prevent full brightness.
Confirm the fixture uses a standard, constant-voltage socket (E26/E27, GU10, etc.) that matches the bulb. If the fixture has a physical dimmer (rotary or wall dimmer), switch to a non-dimming circuit or use a compatible smart dimmer. For fixtures on motion sensors or timers, ensure those controls supply steady power and don’t interrupt the bulb during setup.
Check socket condition and wiring. Corroded contacts, loose fit, or adapters that change the base type can cause poor connection and instability. Replace damaged sockets or use a different fixture when troubleshooting.
Advanced Troubleshooting and Support
These steps help you get vendor help or replace a bad bulb. Keep your model number, purchase date, and any error messages ready before you contact anyone.
Contacting Manufacturer Support
Call or use the maker’s chat with the bulb’s model number and firmware version at hand. Give the support agent the exact error behavior (no power, blinking, failure to pair) and list steps you already tried: power cycle, app reset, router reboot, and a factory reset of the bulb.
Have these items ready:
- Model and batch numbers (on the bulb or box)
- App screenshots showing errors or unavailable devices
- Router details: SSID type (2.4 GHz vs 5 GHz) and any mesh extenders
- Purchase info: date and store or order number
Ask specific questions: whether they have a known firmware fix, a guided reset sequence, or a bridge/hub requirement. Request an RMA number if the bulb is under warranty and verify whether they cover shipping and replacement timing.
Obtaining Replacement Bulbs
Check warranty terms first to see if the bulb is covered for malfunction or early failure. If within warranty, follow the manufacturer’s RMA process exactly—packaging, photos of the bulb and box, and the proof of purchase speed up approval.
If out of warranty or you prefer a new purchase, compare bulbs by:
- Protocol: Zigbee, Z-Wave, or Wi‑Fi
- Compatibility: your hub, voice assistants, and smart home app
- Specifications: lumens, color temperature range, and certified lifespan
Buy from retailers that offer returns or extended warranties. Keep the receipt and test the new bulb within the return window. If multiple bulbs fail, consider checking your fixture wiring and voltage before replacing more units.
FAQs
Why won’t my smart bulb connect to Wi‑Fi?
You may be out of range or on the wrong band. Move the bulb closer to the router and ensure your phone uses the same 2.4 GHz network if the bulb requires it. Also check the bulb is in pairing mode.
What if the bulb turns off or flickers?
Check physical switches and dimmers first. Many smart bulbs do not work with old dimmer switches and need a full, stable power feed.
How do I reset the bulb?
Most bulbs reset by cycling power a number of times (on/off). Follow your bulb maker’s exact pattern. After reset, repeat the pairing steps in the app.
Why does the app say the bulb is offline?
Your hub, router, or internet may be the issue. Restart the router and any smart hubs, then reopen the app. Make sure firmware and app updates are installed.
Can multiple bulbs interfere with each other?
Yes, crowded wireless channels or too many Bluetooth devices can cause interference. Spread devices across different rooms or use a Wi‑Fi extender.
What about compatibility and firmware?
Confirm the bulb works with your voice assistant or hub. Keep firmware current—updates often fix bugs and stability problems.
When should I replace the bulb?
If hardware fails after testing power and network, or if the bulb won’t respond to resets, replacement may be needed. Check warranty before buying a new one.
Conclusion
Troubleshooting smart bulbs often comes down to checking power, network, and compatibility first. Start with the simple fixes: confirm the bulb has power, the switch is on, and the bulb fits the fixture correctly.
If basic checks don’t work, look at connectivity and settings. Verify your Wi‑Fi or hub is working and that the bulb supports your network type. For hub-based bulbs, consult the hub’s support pages (for example, Philips Hue or Samsung SmartThings) for pairing steps and firmware guidance.
Resetting the bulb and updating firmware often restore function. Follow the manufacturer’s reset method and check for app or router updates. If you see flicker or partial response, check for incompatible dimmer switches or voltage issues too.
Keep a record of what you tried and when the problem started. This helps you explain the issue if you contact support or a technician. For safety concerns like burning smells or sparks, shut power off and get professional help immediately.
If problems persist, contact the bulb maker or your smart home platform for guided support and warranty options. Using official support pages and user guides will give reliable steps to get your lights working again.