This guide explains what screws do monitor stands use and provides essential tips for setup. You’ll learn how to identify the right screws, attach your stand securely, and troubleshoot common issues. Follow our step-by-step instructions for a safe and stable monitor mount.
Setting up a monitor stand should be easy. But it can get confusing fast. Why? Those tiny screws! If you’ve ever wondered, “what screws do monitor stands use?” you’re not alone. This guide is here to help. We’ll walk you through everything. You’ll learn about screw types, sizes, and how to set up your stand safely. By the end, you’ll feel confident. You’ll know how to pick the right screws. And you’ll avoid common mistakes. Let’s dive in!
Key Takeaways
- Monitor stands use metric screws: Most stands rely on M4, M6, or M8 screws based on VESA mounting standards, which ensure compatibility across brands.
- Always check the manual first: Your monitor’s manual specifies the exact screw size, length, and type needed to avoid damage during setup.
- Screw length is critical: Using screws that are too long can harm your monitor’s internal components, while short screws may not provide a secure hold.
- Proper tools prevent issues: A Phillips screwdriver or hex key is typically required; avoid over-tightening to prevent stripped threads or cracks.
- VESA patterns matter: Understand VESA hole patterns (e.g., 75x75mm or 100x100mm) to ensure your stand and monitor are compatible before purchasing screws.
- Keep spares handy: Save extra screws from old setups or buy a kit, as missing screws are a common problem that can delay your installation.
- Troubleshoot calmly: If screws don’t fit, double-check the size or use adapters; for stripped screws, try rubber band or extraction tools for easy fixes.
Understanding Monitor Stand Screws
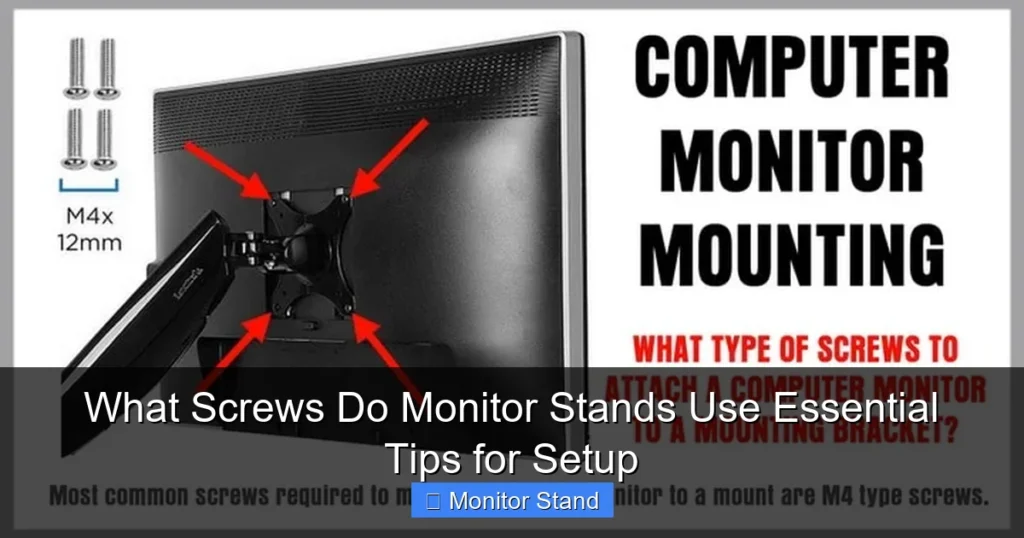
First, let’s talk basics. Monitor stands use screws to attach to your monitor. These screws are usually metric. They follow standards set by VESA. VESA stands for Video Electronics Standards Association. They make rules for mounting. This helps different brands work together. So, when you ask, “what screws do monitor stands use?” the answer often ties to VESA. But not all monitors are the same. Some have unique needs. We’ll cover that too.
Common Screw Types
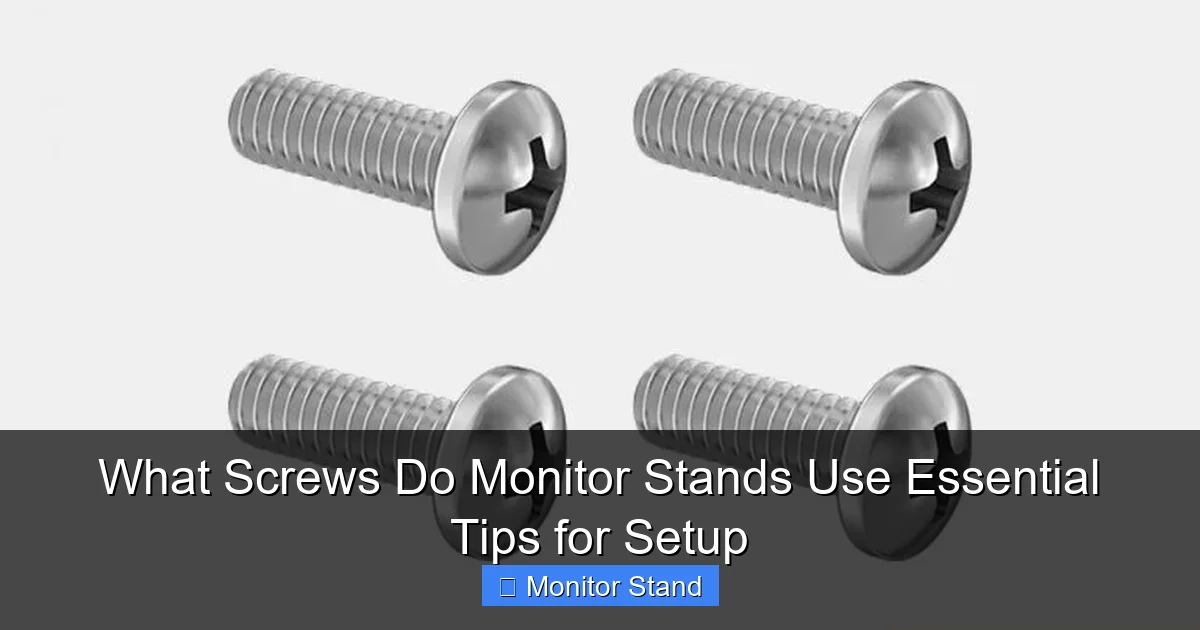
Most monitor stands use machine screws. These have threads that go into nuts or threaded holes. The common types are:
- M4 screws: These are small. They are often used for lighter monitors or VESA 75×75 patterns. The “M” means metric. The “4” is the diameter in millimeters.
- M6 screws: These are medium-sized. They are common for larger monitors with VESA 100×100 patterns. They offer more strength.
- M8 screws: These are larger. They are used for heavy monitors or gaming setups. They provide extra stability.
You might also see Phillips head or hex head screws. Phillips head has a cross shape. Hex head has a six-sided shape. Both are easy to use with the right tool.
Screw Sizes and Measurements
Screw size includes diameter and length. Diameter is like M4, M6, or M8. Length is how long the screw is. It’s measured in millimeters. For example, an M4x10 screw is 4mm wide and 10mm long. Length is key. Too long, and you might damage your monitor. Too short, and the stand won’t hold. Always measure carefully. Your monitor manual will list the exact size. If not, we’ll show you how to find it.
Step-by-Step Guide to Identifying Your Screws
Don’t guess with screws. A wrong screw can ruin your monitor. Follow these steps to find the right ones. This will save you time and stress.

Visual guide about What Screws Do Monitor Stands Use Essential Tips for Setup
Image source: shuntool.com
Check the Monitor Manual
Start with the manual. It’s your best friend. Look for a section on mounting or stand installation. There, you’ll see screw specifications. It might say “M4x10 screws” or similar. Write this down. If you lost the manual, don’t worry. Check online. Search your monitor model and “mounting specs.” Most brands have PDF manuals on their websites.
Examine the Existing Stand
If you have an old stand, look at its screws. Unscrew one carefully. Use a ruler or caliper to measure it. Measure the diameter first. Then measure the length. Compare it to common sizes like M4 or M6. This gives you a clue. But be sure. Sometimes stands come with extra screws. Check the package if you still have it.
Use a Screw Gauge
A screw gauge is a handy tool. It has holes for different screw sizes. You try your screw in each hole until it fits. This tells you the diameter. You can buy one cheaply online. Or use a ruler. For length, measure from under the head to the tip. This step is great if you’re unsure. It takes the guesswork out.
How to Attach a Monitor Stand
Now, let’s set up your stand. We’ll go step by step. Safety first! Work on a clean, flat surface. Have all tools ready. This makes the process smooth.
Visual guide about What Screws Do Monitor Stands Use Essential Tips for Setup
Image source: thegeekpub.com
Preparing Your Workspace
Clear a desk or table. Lay down a soft cloth. This protects your monitor screen. Gather your screws, stand, and tools. You’ll need a screwdriver or hex key. Check the screws from earlier. Make sure they match your monitor’s needs. If you’re missing screws, pause. Get the right ones before proceeding. Rushing can lead to mistakes.
Aligning the Screw Holes
Place your monitor face down on the cloth. Be gentle. Find the mounting holes on the back. They are usually in a square pattern. Align the stand’s bracket with these holes. The holes should match perfectly. If not, your stand might not be compatible. Double-check the VESA pattern. Once aligned, hold the bracket in place.
Tightening the Screws Properly
Insert the screws by hand first. This prevents cross-threading. Turn them clockwise until snug. Then, use your tool. Tighten each screw a little at a time. Go in a star pattern. For example, tighten the top left, then bottom right, then top right, then bottom left. This ensures even pressure. Don’t over-tighten! Stop when the screw is firm. Over-tightening can strip threads or crack the monitor. If you feel resistance, stop. That’s enough.
Practical Tips for a Secure Setup
Here are some pro tips. They will help you get it right the first time. These tips answer “what screws do monitor stands use” in a practical way.

Visual guide about What Screws Do Monitor Stands Use Essential Tips for Setup
Image source: i.ytimg.com
Using the Right Tools
Use a screwdriver that fits perfectly. A loose tool can strip screw heads. For Phillips screws, use a Phillips screwdriver. For hex screws, use a hex key. Magnetic tips are helpful. They hold screws in place. This makes insertion easier. Also, keep a small container for screws. You won’t lose them.
Avoiding Common Mistakes
Avoid these errors:
- Using wrong screw length: Always check length. If screws are too long, add washers or spacers. But better to get the correct screw.
- Mixing screws: Don’t use screws from other devices. They might look similar but could damage your monitor.
- Ignoring VESA: Ensure your stand and monitor have the same VESA pattern. Common patterns are 75x75mm and 100x100mm. Measure if unsure.
Take your time. Rushing causes problems.
Troubleshooting Screw Issues
Even with care, issues can pop up. Here’s how to fix them. Stay calm. Most issues have simple solutions.
Screws Don’t Fit
If screws won’t go in, check the size. Are they the right diameter? Try a different screw. If the holes are too big, use adapters. Adapters are small metal rings. They reduce hole size. You can buy them online. Also, ensure you’re not forcing it. Cross-threading happens when you force screws. Start by hand to avoid this.
Stripped Screws
Stripped screws are frustrating. The head gets worn. You can’t turn it. Try a rubber band. Place it over the screw head. Press your screwdriver into it. The rubber adds grip. Turn slowly. If that fails, use a screw extractor tool. It bites into the screw for removal. Once out, replace the screw. Don’t reuse stripped screws.
Missing Screws
Lost screws? Don’t panic. Check the original packaging. Sometimes extras are included. If not, contact the manufacturer. They might send replacements. Or visit a hardware store. Bring your monitor model info. They can help find matches. Online stores sell screw kits for monitors. These kits have various sizes. They are handy for future projects.
Conclusion
Now you know what screws do monitor stands use. It’s not as hard as it seems. Remember, start with the manual. Use metric screws like M4, M6, or M8. Match the length to your monitor. Follow the steps for a secure attach. Use the right tools. And troubleshoot with confidence. Your monitor stand should be stable and safe. Enjoy your new setup! If you have questions, check the FAQ below. Happy mounting!