Connecting a smart bulb to your WiFi is a straightforward process that unlocks convenient, automated lighting control. The core steps involve screwing in the bulb, downloading the companion app, and following the in-app instructions to join your 2.4GHz WiFi network. With a little preparation and patience, you’ll be controlling your lights with your phone or voice in just a few minutes.
Imagine walking into your home, and with a simple voice command, the living room lights up in a warm, welcoming glow. Or picture your porch light turning on automatically at sunset, even when you’re away. This isn’t science fiction—it’s the everyday magic of a WiFi-connected smart bulb. If you’ve just unboxed your first smart bulb, you might be wondering where to start. The good news? Learning how to connect a smart bulb to WiFi is easier than you think.
Gone are the days of complex wiring or needing a degree in computer science. Today’s smart bulbs are designed for everyone. They screw into your existing light sockets and use your home’s wireless network to become controllable from your smartphone. This guide will walk you through the entire process, from unboxing to automation. We’ll cover all the essential steps, share pro tips, and troubleshoot common issues. Let’s turn that clever piece of tech into a brilliant part of your daily life.
Key Takeaways
- Preparation is Key: Ensure you have a 2.4GHz WiFi network, a compatible mobile app, and the bulb installed in a powered fixture before starting.
- Hub vs. Hubless: Most modern smart bulbs connect directly to WiFi without a separate hub, simplifying setup but relying on your home network’s strength.
- The 2.4GHz Requirement is Non-Negotiable: Smart bulbs almost exclusively connect to the 2.4GHz band of your WiFi; a dual-band network is fine, but the setup process will use this band.
- The App is Your Command Center: The manufacturer’s app (like Tuya Smart, Kasa, or Philips Hue) is essential for setup, connecting to WiFi, and accessing all smart features.
- Power-Cycle to Reset: If the setup fails, the universal reset method is to turn the bulb off and on 3-5 times until it flashes, restoring it to factory settings.
- Patience During Pairing: The connection process can take 30-90 seconds; avoid closing the app or turning off the bulb during this critical window.
- Unlock Full Automation: After connecting, explore schedules, scenes, and voice assistant integration (Alexa, Google Assistant, Siri) for a truly smart home experience.
📑 Table of Contents
Understanding Your Smart Bulb and Pre-Connection Prep
Before we dive into the step-by-step process, let’s set the stage for success. A little preparation prevents most common setup headaches.
What’s in the Box and What You’ll Need
Your smart bulb likely came with minimal packaging: the bulb itself and maybe a quick start guide. Here’s what you absolutely need to have ready:
- The Smart Bulb: Ensure it’s the correct base (like standard E26 or smaller E12) for your lamp or fixture.
- A Smartphone or Tablet: This is your remote control and setup device. Make sure it’s connected to your home WiFi.
- Your Home WiFi Network: Critically, you must know your WiFi network name (SSID) and password.
- A Light Fixture: Have a working lamp or ceiling fixture ready. It’s best to use a lamp close to your WiFi router initially for a strong signal during setup.
The Crucial 2.4GHz WiFi Requirement
This is the most important technical point. Nearly all smart bulbs only connect to 2.4GHz WiFi networks. Most modern routers broadcast two networks: a 2.4GHz band (better range, slower speed) and a 5GHz band (faster speed, shorter range). Your phone might be connected to the 5GHz band. The bulb cannot see this. During setup, your app will often guide your phone to the 2.4GHz network temporarily. Don’t worry—this is normal. Just follow the prompts.
Step-by-Step Guide: How to Connect Smart Bulb to WiFi
Now for the main event. Follow these steps in order for the smoothest experience.
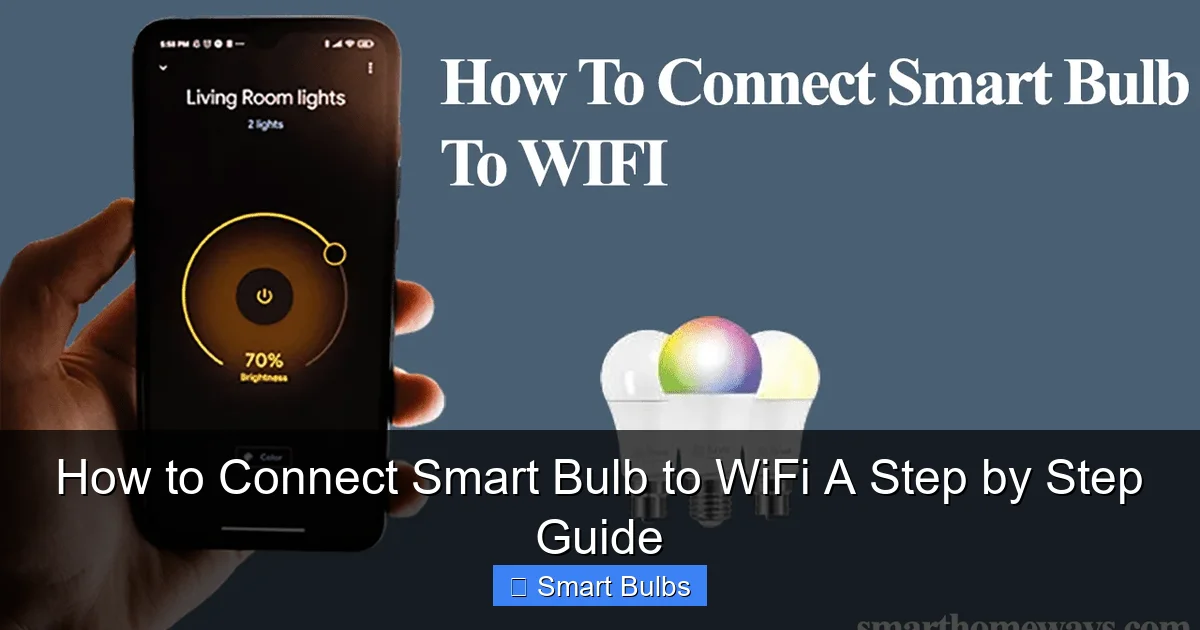
Visual guide about How to Connect Smart Bulb to WiFi A Step by Step Guide
Image source: smarthomeways.com
Step 1: Physical Installation
First, screw your smart bulb into your chosen light fixture. Turn the fixture’s power switch ON. The bulb should light up with a default white or soft glow. If it doesn’t, check the fixture’s power and bulb seating. Important: Use a standard, dimmable fixture only if the bulb specifically states it’s dimmable. Non-dimmable smart bulbs in dimmer switches can behave erratically.
Step 2: Download the Companion App
Open your phone’s app store (Google Play or Apple App Store). Search for the app specified on your bulb’s packaging. Common apps include:
- Tuya Smart / Smart Life: Used by countless affordable bulb brands.
- Kasa Smart: For TP-Link Kasa products.
- Philips Hue: For the Hue ecosystem (which often uses a bridge, but some bulbs are Bluetooth/WiFi).
- Wiz: For Philips Wiz bulbs.
- EufyHome / Wyze / Meross: Brand-specific apps.
Download and open the app. You will need to create an account. This account is what allows you to control your bulbs remotely, even when you’re not home.
Step 3: Put the Bulb in Pairing Mode
This step tells the bulb, “Get ready to receive network info.” The most common method is a power-cycle reset. With the bulb on, turn the wall or lamp switch OFF, then ON again. Do this 3 to 5 times, leaving it on after the last cycle. You’ll know it worked when the bulb begins to flash or rhythmically pulse. This means it’s in pairing (or “AP”) mode and broadcasting its own signal for your phone to find. Refer to your manual, as some brands use different patterns.
Step 4: Follow the In-App Setup Wizard
Inside the app, tap the “+” or “Add Device” button. The app will typically ask what type of device you’re adding—select “Lighting” or “Light Bulb.” It will then ask for permission to access your local network and location (this is necessary for finding devices). The app will search for your flashing bulb.
Once it finds the bulb, it will present a list of nearby WiFi networks. Select your home’s 2.4GHz network and carefully enter the password. The app then sends this network information directly to the bulb. This process can take 30 seconds to 2 minutes. Do not close the app or turn off the bulb during this time. A success message will appear when the bulb connects and appears in your app’s device list.
Optimizing and Controlling Your New Smart Light
Congratulations! Your bulb is now online. But the fun is just beginning. The app is now your light switch, dimmer, and color palette.
Visual guide about How to Connect Smart Bulb to WiFi A Step by Step Guide
Image source: jopetlimited.co.ke
Basic Controls and Naming
Tap on the bulb’s icon in the app. You should see basic controls: an on/off button, a brightness slider, and for color bulbs, a color wheel or scene selector. Your first task should be to rename the bulb from “Light 1” to something useful like “Bedroom Lamp” or “Kitchen Ceiling.” This is crucial if you plan to add more bulbs or use voice control.
Exploring Advanced Features
Now, explore the app’s menu. Look for these powerful features:
- Schedules: Set the bulb to turn on at sunset and off at bedtime automatically.
- Scenes & Themes: Create presets like “Movie Night” (dimmed amber) or “Concentrate” (bright cool white).
- Groups/Rooms: Combine multiple bulbs into a room (e.g., “Living Room”) to control them all at once.
- Vacation Mode: Randomly turn lights on/off to make your home look occupied while you’re away.
Connecting to Voice Assistants and Troubleshooting
To achieve true hands-free control, link your smart bulb app to your preferred voice assistant.
Integrating with Alexa, Google Assistant, or Siri
The process is similar across platforms. In your smart bulb app, look for a menu called “Skills,” “Works With,” or “Voice Assistants.” Select your assistant (e.g., “Amazon Alexa”) and follow the linking steps, which usually involve logging into your Amazon/Google/Apple account. Once linked, discover devices in your assistant’s app. You can then say, “Alexa, turn on the Bedroom Lamp” or “Hey Google, set the Living Room to blue.“
Common Problems and Quick Fixes
If things didn’t go smoothly, you’re not alone. Here are fast fixes:
- Bulb Not Found? Ensure your phone’s Bluetooth is ON (some setups use it for initial pairing). Move the bulb/fixture closer to the router. Re-enter pairing mode.
- Connection Fails? Double-check you entered the correct WiFi password for the 2.4GHz network. Restart your phone and router.
- Bulb Disconnects Randomly? Weak WiFi signal is the usual culprit. Consider a WiFi extender if the bulb is far from the router.
- The Nuclear Option: Factory Reset: If all else fails, use the power-cycle method (off-on 3-5 times until flashing) to reset the bulb and start the setup process from scratch.
Conclusion: Enjoy Your Illuminated Smart Home
Learning how to connect a smart bulb to WiFi is your first step into a more convenient and responsive home. What starts with a single bulb asking, “What color should I be?” can grow into a fully automated lighting system that welcomes you home, helps you sleep, and sets the perfect mood for any occasion. The process is designed to be simple, and once you’ve done it once, adding a second or third bulb takes mere minutes. So take a moment to appreciate your handiwork. Tell your voice assistant to dim the lights, set a schedule for tomorrow, and enjoy the brilliance of a smarter home, one bulb at a time.
Frequently Asked Questions
Can I connect a smart bulb to 5GHz WiFi?
No, almost all smart bulbs are designed to connect only to a 2.4GHz WiFi network. This band offers better range and wall penetration, which is more reliable for low-power, always-on devices like smart bulbs. Ensure your router is broadcasting a 2.4GHz network for setup.
Do I need a smart hub to use a WiFi smart bulb?
For most WiFi bulbs, no hub is required. They connect directly to your home network. Some ecosystems, like certain Philips Hue bulbs, use a dedicated hub for more advanced features and reliability, but many modern bulbs are “hubless” and rely solely on your WiFi.
What do I do if my smart bulb keeps disconnecting from WiFi?
This is often due to a weak WiFi signal. Move the bulb closer to your router or consider a WiFi extender. Also, ensure your router’s firmware is updated and try reducing the number of devices on the 2.4GHz band by connecting phones and laptops to the 5GHz band instead.
How many smart bulbs can I connect to my WiFi?
This depends on your router’s capacity. Most home routers can handle 20-50 connected devices comfortably. However, each bulb is a separate device. If you plan to have dozens, ensure you have a robust router to maintain stable connections for all your smart home gadgets.
Is it safe to use smart bulbs? Are they a security risk?
Reputable brands implement strong security. To stay safe, always create a unique password for your bulb’s app account, keep the app firmware updated, and consider placing smart bulbs on a separate “Guest” WiFi network to isolate them from your main devices containing sensitive data.
Can I use a smart bulb in a fixture with a dimmer switch?
Only if the smart bulb is explicitly labeled as “dimmable.” Using a non-dimmable smart bulb on a dimmer circuit can cause flickering, buzzing, and premature failure. For best results with dimmable smart bulbs, set the physical dimmer switch to 100% and control brightness exclusively through the app.