This guide provides a complete walkthrough on how to remove a Dell monitor stand safely and quickly. You’ll learn the essential steps for various models and avoid common pitfalls that could damage your monitor. Follow our instructions to prepare your monitor for mounting or storage with ease.
Key Takeaways
- Prepare Your Workspace: Ensure a clean, soft surface to prevent scratches and damage to the monitor screen during the removal process.
- Identify Your Model: Different Dell monitors have varying stand removal mechanisms; check your model number first to follow the correct method.
- Use the Right Tools: Some stands require a screwdriver or other tools; gather them beforehand to avoid interruptions and ensure a smooth removal.
- Follow Release Mechanisms: Look for buttons, levers, or screws that secure the stand; press or turn them as directed to safely detach the stand.
- Lift Carefully: Once released, lift the monitor straight up to separate it from the stand without forcing it, which can prevent damage to the monitor’s ports.
- Troubleshoot Common Issues: If the stand doesn’t come off easily, check for hidden clips or refer to the manual; patience is key to avoiding breakage.
- Store Stand Safely: Keep the stand and screws in a safe place if you plan to reattach it later, maintaining organization for future use.
Introduction: Your Guide to Removing a Dell Monitor Stand
Hello there! If you’re looking to remove your Dell monitor stand, you’ve come to the right place. Whether you’re setting up a multi-monitor workspace, mounting your screen on a VESA arm, or simply need to pack it for moving, this guide will walk you through the process safely and quickly. We’ll cover all the steps, from preparation to troubleshooting, so you can get the job done without any hiccups. Removing a Dell monitor stand might seem daunting, but with the right approach, it’s a breeze. By the end of this guide, you’ll be confident in how to remove Dell monitor stand components without risking damage to your valuable equipment.
Why Remove a Dell Monitor Stand?
You might wonder why anyone would want to remove a Dell monitor stand. There are several good reasons. First, many users switch to VESA mounts for ergonomic benefits. VESA mounts let you adjust height, tilt, and swivel for comfort. Second, in multi-monitor setups, stands can take up desk space. Removing them allows for cleaner arrangements. Third, you might need to transport your monitor. Stands can be bulky. Taking them off makes packing easier. Finally, some stands are replaced with third-party options for better design. No matter your reason, learning how to remove Dell monitor stand parts is a useful skill.
Visual guide about How to Remove Dell Monitor Stand Safely and Quickly
Image source: i.ytimg.com
Tools and Preparation: Setting Up for Success
Before you start, proper preparation is key. This ensures you remove your Dell monitor stand without issues. Let’s dive into the details.
Visual guide about How to Remove Dell Monitor Stand Safely and Quickly
Image source: simplifysmarthome.com
Workspace Setup
Choose a flat, stable surface. A table or desk works well. Cover it with a soft cloth or towel. This protects the monitor screen from scratches. Make sure the area is well-lit. You need to see small buttons or screws. Keep pets and kids away. This avoids accidents. Have enough space to move the monitor gently. If your monitor is large, consider having a helper. They can hold the monitor while you detach the stand. Safety first!
Tools Needed
Most Dell monitor stand removal processes are tool-free. But some models need tools. Here’s a list to have handy:
- Phillips screwdriver: Often size #1 or #2. Used for stands with screws.
- Flathead screwdriver: Helpful for prying clips if needed, but use caution.
- Microfiber cloth: To clean the monitor and handle it without leaving fingerprints.
- Container for screws: A small bowl or bag to keep screws safe. Losing them can be frustrating.
- User manual: Always good to reference. If you don’t have it, Dell’s website has digital copies.
Gather these items before starting. It saves time and reduces stress. Now, let’s identify your monitor model.
Identifying Your Dell Monitor Model
Dell makes many monitor series. Each may have a different stand design. Knowing your model helps you follow the right steps. Check the back of your monitor. There’s usually a label with the model number. It might look like “Dell U2415H” or “Dell S2721DGF”. Write it down. You can also find it in the settings menu. Go to the OSD (On-Screen Display) and look for system information. Once you have the model, you can search online for specific instructions. But this guide covers common methods. Most Dell monitors use similar mechanisms. We’ll group them for simplicity.

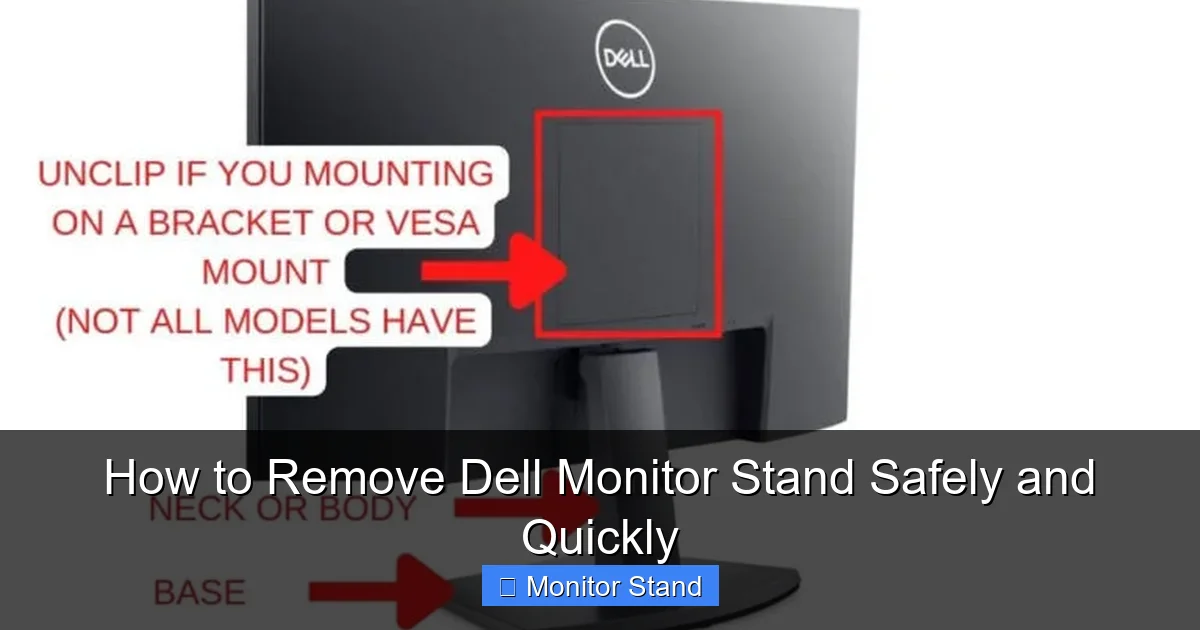
Visual guide about How to Remove Dell Monitor Stand Safely and Quickly
Image source: onecomputerguy.com
Step-by-Step Guide to Remove Dell Monitor Stand
Now, the core of this guide: how to remove Dell monitor stand step by step. We’ll break it down by mechanism type. Follow along carefully.
For Monitors with Quick Release Buttons
Many newer Dell monitors have quick release buttons. This is the easiest way to remove a Dell monitor stand. Here’s how:
- Step 1: Place the monitor face down on the soft cloth. Ensure the screen is protected.
- Step 2: Look at the back of the monitor. Find the stand neck. Near the base, you’ll see a button or lever. It’s often labeled with a stand icon.
- Step 3: Press the button firmly. You might hear a click. Hold it down.
- Step 4: While holding the button, lift the monitor straight up. The stand should detach easily. If it doesn’t, don’t force it. Check for additional clips.
Example: Dell UltraSharp series like U2719D often have this button. It’s usually black and located centrally. Press it, and the stand slides off. Simple!
For Monitors with Screws
Older or budget Dell models may use screws. To remove Dell monitor stand with screws, do this:
- Step 1: Lay the monitor face down on the cloth. Be gentle to avoid pressure on the screen.
- Step 2: Locate the screws. They are at the junction where the stand neck meets the monitor back. There are typically four screws.
- Step 3: Use your Phillips screwdriver to unscrew them. Turn counterclockwise. Place screws in your container.
- Step 4: Once all screws are out, lift the monitor away from the stand. It should come free. If it sticks, wiggle it slightly.
Tip: Some screws might be tight. Apply steady pressure. Avoid stripping the screw heads. If that happens, try a rubber band for grip. This method is common in models like Dell E series.
For Monitors with Latches or Levers
Some Dell monitors have latches or levers. These are also tool-free. Here’s the process:
- Step 1: Position the monitor face down on your soft surface.
- Step 2: Find the latch. It might be a small lever you pull or a clip you press. Look around the stand attachment point.
- Step 3: Activate the latch. Pull the lever or press the clip. You might need to hold it open.
- Step 4: While holding the latch, lift the monitor up. The stand should release. If it doesn’t, check if there’s a second latch on the other side.
Example: Dell Alienware monitors often use levers. They’re designed for easy removal for gaming setups. Just pull the lever, and the stand comes off. Quick and efficient!
Regardless of the method, always handle the monitor with care. The goal is to remove your Dell monitor stand without strain. Now, what if things don’t go as planned? Let’s troubleshoot.
Troubleshooting Common Problems
Sometimes, Dell monitor stand removal can hit snags. Don’t worry! Here are solutions to common issues.
- Problem 1: The button won’t press. This can happen if dirt is stuck. Use compressed air to clean around the button. Or, check if the monitor is locked. Some models have a security lock. Disable it first.
- Problem 2: Screws are stuck. If screws won’t turn, apply a small amount of lubricant like WD-40. Let it sit for a minute. Then try again. Be careful not to get lubricant on the screen.
- Problem 3: The stand seems attached after release. There might be hidden clips. Gently inspect the attachment area. Use a flashlight to see better. If you find clips, press them simultaneously while lifting.
- Problem 4: You lost the screws. If screws are missing, contact Dell support. They can send replacements. Or, check hardware stores for similar screws. Match the size and thread.
- Problem 5: The monitor is too heavy. For larger monitors, like Dell 34-inch ultrawides, get help. Have a friend hold the monitor while you remove the stand. This prevents drops.
Remember, patience is key. Rushing can cause damage. If you’re unsure, pause and consult the manual. Now, let’s talk safety.
Safety Tips and Best Practices
To ensure you remove a Dell monitor stand safely, follow these tips:
- Always power off and unplug the monitor. This avoids electrical shock and damage.
- Handle the screen with care. Avoid touching the screen directly. Use the edges. Screens are delicate.
- Lift with your legs, not your back. Monitors can be heavy. Proper lifting prevents injury.
- Keep children and pets away. This is a precise task. Distractions can lead to accidents.
- Don’t force anything. If something doesn’t move easily, stop. Reassess the mechanism. Forcing can break plastic parts.
- Use anti-static precautions if possible. Static electricity can harm electronics. Work on a non-carpeted surface.
By following these, you’ll master how to remove Dell monitor stand components without risk. Next, let’s discuss what to do after removal.
What to Do After Removing the Stand
Once you’ve successfully removed the stand, you have options. Here’s what to consider:
- Install a VESA mount. Most Dell monitors have VESA patterns (like 100x100mm). Attach a mount for flexible positioning. This is a popular reason to remove your Dell monitor stand.
- Store the stand properly. If you might reattach it later, keep the stand and screws in a box. Label it for easy finding.
- Clean the monitor. Use a microfiber cloth to wipe the back and screen. Now’s a good time for maintenance.
- Set up your new configuration. Whether mounting or placing the monitor on a stand, ensure it’s secure. Test stability before use.
For example, if you’re mounting, follow the VESA mount instructions. Tighten screws evenly. Then, enjoy your new setup! This process enhances your workspace ergonomics.
Conclusion: You’re Ready to Remove That Stand!
Congratulations! You’ve learned how to remove a Dell monitor stand safely and quickly. We covered preparation, step-by-step methods for different models, troubleshooting, and safety tips. Remember, the key is to take your time and follow the instructions. Whether you’re using a quick release button, screws, or latches, you can now confidently detach your stand. This skill opens up new possibilities for your monitor setup. So go ahead, remove that Dell monitor stand, and enjoy a more flexible and efficient workspace. Happy computing!