This guide provides everything you need to know to choose, install, and optimize a monitor stand with a clamp. You will learn how to safely attach it to your desk, achieve the perfect ergonomic setup, and finally clear away clutter. Transforming a crowded desk into a spacious, productive area is easier than you think.
Key Takeaways
- Unlock Valuable Desk Real Estate: By lifting your monitor off the desk, a clamp stand frees up the entire surface underneath for notebooks, phones, or other essentials, instantly decluttering your workspace.
- Ensure a Secure and Compatible Fit: The success of your installation hinges on measuring your desk’s thickness and material, and ensuring the clamp’s maximum opening is wider than your desk edge.
- Prioritize Ergonomic Adjustment: The true value is in adjustability. Look for stands with easy height, tilt, and swivel controls to position your screen at a healthy, comfortable viewing angle to reduce neck and eye strain.
- Integrate Cable Management from the Start: Use the built-in cable channels or clips on your stand during assembly. This prevents messy, dangling wires and maintains the clean, organized look you’re aiming for.
- Follow a Step-by-Step Assembly Process: A successful installation follows a logical sequence: prepare your desk and monitor, attach the mounting plate, assemble the arm, clamp it securely, and then fine-tune the position. Rushing can lead to mistakes.
- Leverage Advanced Features for Productivity: Explore the benefits of dual monitor arms for multi-tasking or a laptop tray add-on to create a truly unified and elevated workstation.
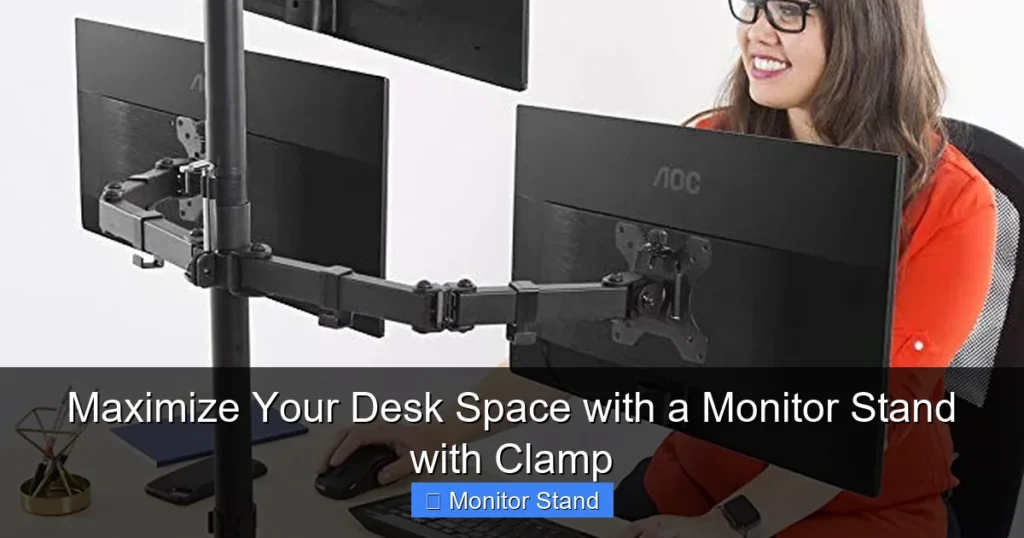
Maximize Your Desk Space with a Monitor Stand with Clamp: Your Complete Guide
Does your desk feel like a chaotic jungle of wires, monitor bases, and coffee cups? You are not alone. Many of us start with a clean slate, only to watch our workspace disappear under the necessities of modern computing. The good news? There’s a powerful, simple, and often affordable solution: a monitor stand with a clamp.
This guide is your friendly roadmap from a cluttered desk to a clean, spacious, and healthy workspace. We will walk through every step. You will learn how to choose the right stand, install it safely, and set it up for maximum comfort and productivity. Say goodbye to that bulky monitor base and hello to a new era of desk freedom.
Why Choose a Clamp Monitor Stand?
Before we dive into the “how,” let’s talk about the “why.” A clamp-mounted monitor stand offers distinct advantages over traditional stands or ones with a large desk-penetrating grommet base.

Visual guide about Maximize Your Desk Space with a Monitor Stand with Clamp
Image source: m.media-amazon.com
First, it saves an incredible amount of space. The entire area under your monitor becomes usable. This is prime real estate for a notebook, your keyboard when not in use, or even a small desk plant.
Second, it provides superior stability and security. A well-designed clamp distributes the monitor’s weight over a larger area of the desk edge. This means less wobble when you type or adjust your screen compared to some freestanding arms.
Finally, it offers unmatched ergonomic flexibility. You can easily adjust the height to ensure the top of your screen is at or just below eye level. You can tilt it to reduce glare and swivel it to share your screen with a colleague. This adjustability is key to preventing neck, shoulder, and eye strain during long work sessions.
Step 1: Choosing the Perfect Monitor Stand
Not all clamp stands are created equal. Picking the right one from the start ensures a smooth experience.

Visual guide about Maximize Your Desk Space with a Monitor Stand with Clamp
Image source: m.media-amazon.com
Check Your Monitor’s Specifications
This is the most critical step. You need two numbers from your monitor’s manual or its back panel:
- VESA Mount Pattern: This is the square or rectangular pattern of four screw holes on the back of your monitor. It’s measured in millimeters (e.g., 75x75mm or 100x100mm). Your stand must be compatible with this pattern.
- Monitor Weight: Find the exact weight of your monitor, usually in kilograms (kg) or pounds (lbs).
Understand Stand Specifications
Now, match your monitor’s specs to the stand’s capabilities:
- VESA Compatibility: Ensure the stand’s mounting plate lists your monitor’s pattern (e.g., “75×75/100x100mm”). Most quality stands support both.
- Weight Capacity: The stand’s maximum weight capacity must be higher than your monitor’s weight. A good rule is to have at least 20% overhead for safety and ease of movement.
- Desk Clamp Compatibility: Measure your desk’s thickness at the edge. The stand’s clamp must open wide enough to accommodate it. Also, note your desk material. Clamps work great on solid wood, particleboard, and most laminated surfaces. They are not suitable for glass desks unless a special protector is used.
Consider Features and Ergonomics
Think about how you work:
- Range of Motion: Do you need just height adjustment, or full tilt, swivel, and even portrait mode rotation?
- Cable Management: Look for built-in channels or clips to route your monitor’s power and video cables neatly along the arm.
- Single vs. Dual: If you use two monitors, a dual-arm clamp stand is more space-efficient and cohesive than two separate arms.
Step 2: Gathering Your Tools and Preparing for Installation
You’re almost ready to build! A little preparation makes everything easier.

Visual guide about Maximize Your Desk Space with a Monitor Stand with Clamp
Image source: m.media-amazon.com
First, clear your desk completely. You need clear access to the edge where the clamp will go. Have a soft cloth or towel ready to lay your monitor face-down on.
Next, gather your tools. Most stands come with all the necessary hex keys (Allen wrenches) and sometimes a small screwdriver. It’s helpful to have a Phillips-head screwdriver on hand just in case. Read the instruction manual that came with your stand thoroughly before touching any parts.
Finally, do a quick mock-up. Hold the clamp section to your chosen desk spot. Make sure there’s nothing underneath (like a drawer or a structural beam) that the clamp or bolt might hit. Ensure you have enough clearance behind the desk for the arm to extend.
Step 3: The Step-by-Step Installation Process
Follow these steps in order for a safe and secure installation.
1. Prepare and Secure the Mounting Plate
Gently lay your monitor screen-down on the soft cloth. Attach the VESA mounting plate from your stand to the back of your monitor using the provided screws. Do not overtighten! The screws should be snug and secure, but forcing them can damage your monitor’s internal threads. If your monitor has a removable stock stand, detach it first.
2. Assemble the Monitor Arm (If Required)
Some stands come fully assembled, others in a few pieces. If needed, connect the main arm to the clamp assembly or the mounting plate connection point. Tighten all joints only enough to hold the arm in place. You will do a final tightening once the monitor is attached and positioned.
3. Attach the Clamp to Your Desk
Position the clamp on the edge of your desk at your desired spot. For stability, placing it towards the center of the desk’s back edge is often best. Slide the adjustable part of the clamp to fit your desk’s thickness. Begin tightening the clamping knob or bolt by hand. For ultimate stability, many clamps include a small metal plate (a “grommet bracket”) that goes under the desk. If yours has one, be sure to use it. It spreads the pressure and prevents damage to your desk.
4. Attach the Monitor and Route Cables
With the arm secured to the desk, you can now attach the monitor. Have a friend help you, or carefully lift the monitor and connect the mounted plate to the arm’s head. You should hear a click or feel it lock into place. Secure it with any safety screws provided. Now is the time to route your cables! Use the built-in channels. Feed your HDMI/DisplayPort cable and power cord through from the monitor down to the base of the arm. This keeps everything tidy from the start.
5. Final Adjustments and Tightening
Now for the fun part! Adjust your monitor to the perfect height and angle. Move it slowly. The arm’s tension might be adjustable—if it’s too hard or too easy to move, consult the manual to adjust the tension knobs (usually located at the pivot points). Once your screen is in the ideal position, go back and fully tighten all the adjustment knobs on the arm to lock it in place. Finally, give the desk clamp one last firm tightening to ensure it’s rock-solid.
Step 4: Optimizing Your Ergonomic Setup
Your stand is installed, but your work isn’t done. Proper positioning is what turns a cool gadget into a health investment.
Start with your chair. Sit comfortably with your feet flat on the floor. Adjust the monitor height so the top of the screen is at or slightly below your eye level. This prevents you from craning your neck up or down.
Next, position the monitor about an arm’s length away from you. Tilt the screen slightly backward (about 10-20 degrees). This creates a more natural viewing angle for your eyes. If you use two monitors, position them so the seam between them is directly in front of you. Angle them slightly inward in a gentle arc.
Step 5: Advanced Tips for Cable Management and Accessories
To truly maximize space, go the extra mile with cables and add-ons.
Even with the arm’s channels, you might have extra cable slack. Use a few adhesive-backed cable clips under your desk to route the cables from the clamp base to your computer or power strip. Consider a short, braided cable sleeve to bundle them together for a super-clean look.
Think about accessories. Many clamp stand systems offer add-ons like:
- Laptop Trays: Attach a tray to the main pole of your stand to lift your laptop to monitor height, creating a perfect dual-screen setup.
- Utility Hooks: Small hooks that attach to the arm to hold your headphones.
- Desk Lights: Some high-end stands have integrated lighting that mounts directly to the arm.
Troubleshooting Common Issues
Ran into a problem? Here are quick fixes for common issues.
Problem: The monitor sags or won’t stay in position.
Solution: The arm’s tension is too low. Locate the tension adjustment knobs (check your manual) at the main joints and tighten them incrementally until the arm holds position without sagging but is still easy to adjust.
Problem: The clamp feels wobbly on the desk.
Solution: First, ensure you’ve used the included support plate (grommet bracket) under the desk. Second, double-check that you are tightening the main clamp bolt securely. If your desk is very thin or has a rounded edge, you may need to add a small, sturdy shim (like a piece of hard rubber) between the clamp and the desk for a better grip.
Problem: Cables are dangling or pulling when I move the monitor.
Solution: You likely have too much slack. Unroute the cables, detach the monitor if needed, and feed them through the management system again, leaving just enough length for the full range of motion you use. Secure the cables at the bottom of the arm with a zip tie or velcro strap.
Conclusion: Reclaim Your Workspace
Installing a monitor stand with a clamp is one of the most impactful upgrades you can make to your desk. It’s not just about aesthetics; it’s about reclaiming physical space, organizing your technology, and taking care of your body through better ergonomics. The process—from careful selection to methodical installation—is straightforward and deeply rewarding.
You now have the knowledge to choose the right stand, install it with confidence, and tweak it for perfect comfort. That once-cluttered desk is now a spacious command center for productivity, creativity, or gaming. Enjoy your new, liberated workspace!