Broom finish concrete is a simple, slip-resistant surface created by dragging a broom across fresh concrete. It is popular for driveways, patios, sidewalks, and pool decks because it is affordable, durable, and easy to maintain. This guide explains what broom finish concrete is, its benefits, common uses, costs, and how to create it step by step.
Key Takeaways
- Point 1: Broom finish concrete is created by dragging a broom over fresh concrete to add texture and improve traction.
- Point 2: It is ideal for outdoor surfaces like driveways, sidewalks, patios, and pool decks where slip resistance is important.
- Point 3: Broom finish concrete is more affordable than many decorative finishes while still looking clean and professional.
- Point 4: Proper timing is crucial: the brooming must happen after bleed water evaporates but before the surface fully hardens.
- Point 5: Regular cleaning and sealing help broom finish concrete last longer and resist stains, cracks, and weather damage.
- Point 6: The cost usually ranges from basic to mid-level concrete pricing, making it a budget-friendly choice for large areas.
- Point 7: With the right tools and preparation, homeowners can attempt small broom finish concrete projects themselves.
What Is Broom Finish Concrete Benefits Uses And Cost
Broom finish concrete is one of the most common concrete finishes you see every day. You walk on it on sidewalks. You drive on it in parking lots and driveways. You may even have it on your own patio.
In this guide, you will learn what broom finish concrete is, why it is so popular, where it is best used, how much it costs, and how to create it step by step. You will also get tips, troubleshooting help, and simple care advice so your concrete looks good for many years.
What Is Broom Finish Concrete?
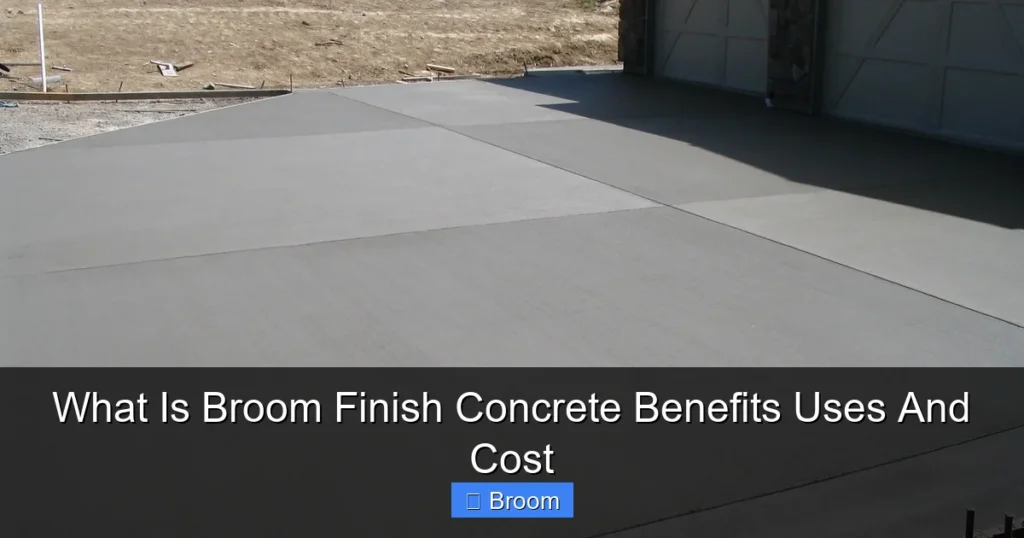
Broom finish concrete is concrete that has been given a light texture by dragging a broom across its surface while it is still fresh. This broom action creates fine lines or ridges in the concrete. These lines add grip and make the surface less slippery.
Visual guide about What Is Broom Finish Concrete Benefits Uses And Cost
Image source: wpgconcrete.com
Contractors use a special concrete broom for this finish. It has stiff or medium-stiff bristles. After the concrete is placed, leveled, and smoothed, the broom is pulled across the surface in straight, even strokes. The result is a simple, clean, and practical finish.
The main reasons people choose broom finish concrete are:
- Slip resistance: The texture helps shoes and tires grip better, even when wet.
- Durability: It holds up well to weather, traffic, and daily use.
- Low cost: It is cheaper than stamped or exposed aggregate finishes.
- Easy to maintain: Cleaning and sealing are simple tasks.
Benefits of Broom Finish Concrete
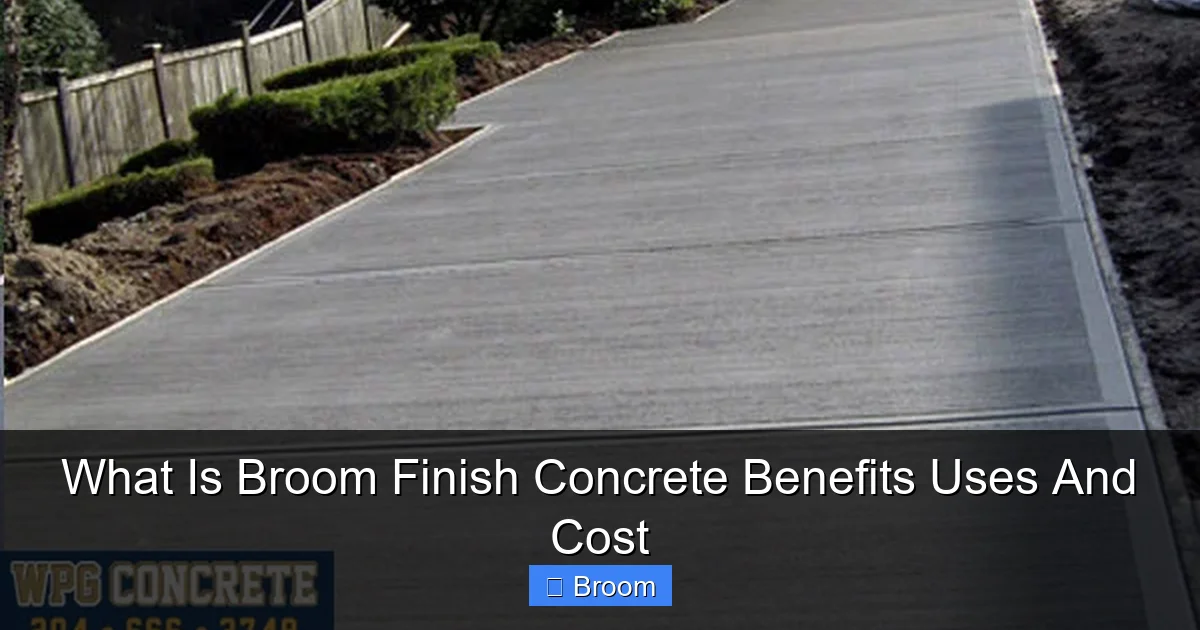
When you compare broom finish concrete to smooth or decorative finishes, it offers a strong mix of performance and value. Here are the main benefits.
Visual guide about What Is Broom Finish Concrete Benefits Uses And Cost
Image source: nextlevelconcrete.ca
Improved Safety and Traction
The biggest benefit of broom finish concrete is better traction. The broom lines interrupt smooth areas and create tiny ridges. These ridges help prevent slips and falls. This is very important in wet or icy climates and around pools and steps.
Budget-Friendly Option
Broom finish concrete is one of the most cost-effective finishes. It does not need complex tools, patterns, or extra materials. Labor time is shorter than for decorative options. If you need to cover a large area, broom finish concrete gives you a safe, neat surface without breaking your budget.
Good Durability
When poured and finished correctly, broom finish concrete can last decades. It stands up to foot traffic, vehicles, and changing weather. The textured surface can also help hide small imperfections and minor wear that would show more on a smooth slab.
Versatile Look
While broom finish concrete is simple, it can still look attractive. You can:
- Change the direction of broom lines (straight, diagonal, or cross-broomed).
- Add colored concrete or stains.
- Use borders with a different finish, like smooth or stamped edges.
This gives you design flexibility while keeping the main surface practical and affordable.
Low Maintenance
Broom finish concrete is easy to live with. Basic cleaning and resealing every few years are usually enough. The texture helps hide dirt and small marks better than a very smooth, glossy surface.
Common Uses for Broom Finish Concrete
Broom finish concrete is used anywhere you want a tough, slip-resistant, and low-cost surface. Here are some of the most common places you will see it.
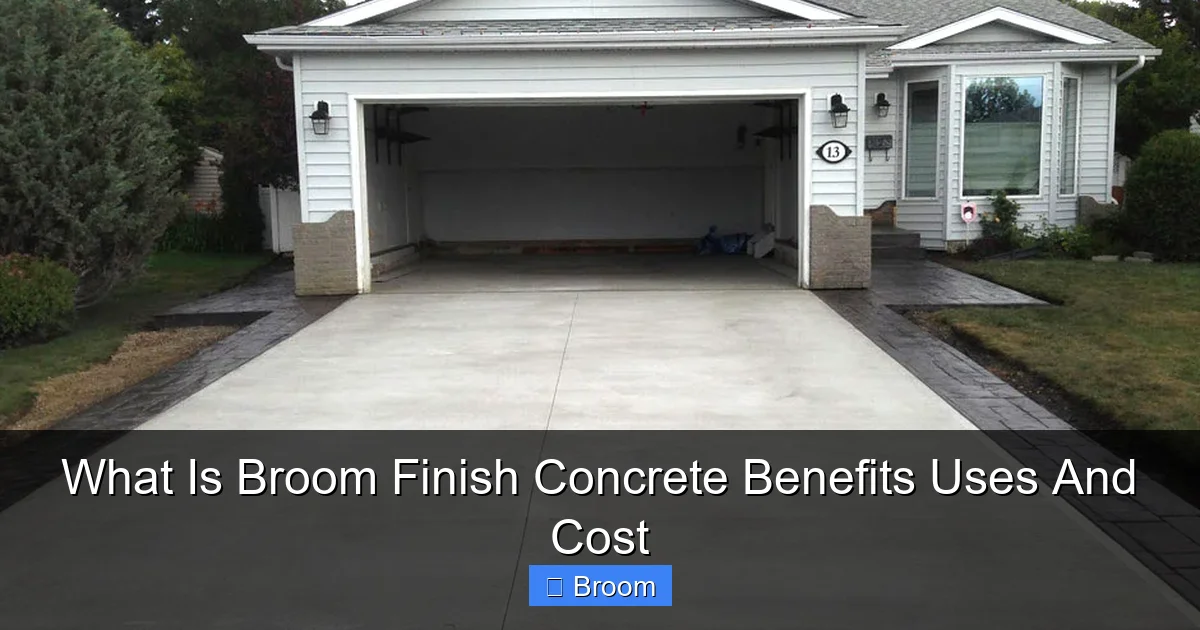
Visual guide about What Is Broom Finish Concrete Benefits Uses And Cost
Image source: abrahamconcrete.com
Driveways and Parking Areas
Driveways and small parking pads are perfect for broom finish concrete. The texture helps tires grip in rain or light snow. It also handles the weight of vehicles well. Many homeowners choose broom finish concrete for new driveways instead of asphalt because it looks cleaner and lasts longer with proper care.
Sidewalks and Walkways
Most city sidewalks are broom finish concrete. The surface is safe for walking, strollers, bikes, and wheelchairs. For home walkways, broom finish concrete provides a neat, uniform look that matches many styles of homes and landscapes.
Patios and Outdoor Living Areas
Patios made with broom finish concrete are practical and easy to furnish. The slight texture helps keep outdoor furniture from sliding and reduces slips from wet feet or spilled drinks. If you want more style, you can add colored concrete or decorative borders while keeping the main area broom finished.
Pool Decks and Steps
Slip resistance is critical around pools and on steps. Broom finish concrete is often used in these areas because the texture improves safety. The finish can be made a bit lighter or softer near pools to be more comfortable on bare feet while still offering grip.
Ramps and Sloped Surfaces
Any sloped surface, such as wheelchair ramps or sloping walkways, benefits from broom finish concrete. The broom lines are often run perpendicular to the slope to give feet and wheels better traction.
How to Create Broom Finish Concrete Step by Step
If you are planning a new slab, it helps to understand how broom finish concrete is made. Even if you hire a contractor, knowing the process lets you ask better questions and check the quality of the work.
Step 1: Plan the Project
Start with clear planning. Decide where the concrete will go, how thick it should be, and what loads it must support.
- Measure the area and calculate the square footage.
- Check local building codes and permit requirements.
- Plan for drainage so water flows away from your home.
- Decide on any control joints, borders, or color.
For most patios and walkways, a 4-inch thick slab is common. Driveways may need 4 to 6 inches depending on soil and vehicle weight.
Step 2: Gather Tools and Materials
To create broom finish concrete, you need all the standard concrete tools plus a broom designed for finishing.
- Concrete mix (ready-mix truck or bagged mix)
- Forms (wood boards and stakes)
- Shovel and rake
- Screed board or straight 2×4
- Bull float or hand float
- Edger and groover for joints
- Concrete finishing broom with proper bristles
- Garden hose or sprayer (for curing, not for adding water to the surface)
- Safety gear (gloves, boots, eye protection)
A special concrete broom is important. Regular household brooms are usually too soft or uneven and can leave messy marks.
Step 3: Prepare the Base
A good base is key for long-lasting broom finish concrete. Poor base prep can lead to cracks and uneven settling.
- Excavate: Remove grass, roots, and topsoil to the depth needed for the slab and base material.
- Add base material: Use compacted gravel or crushed stone, usually 3–4 inches deep.
- Compact: Compact the base with a plate compactor or hand tamper until it is firm and level.
- Install forms: Set up wood forms around the edges, making sure they are level and at the right height.
The base should be stable and slightly sloped away from buildings for drainage.
Step 4: Place and Level the Concrete
Once your base and forms are ready, it is time to place the concrete.
- Have the concrete delivered or mix it on site.
- Pour or shovel the concrete into the forms.
- Use a rake or come-along to spread it evenly.
- Screed the surface with a straight board to level it.
Work fairly quickly, but do not rush. The goal is to get a flat, level slab before the concrete starts to set.
Step 5: Float and Edge the Surface
After screeding, you need to smooth the surface and bring up a bit of paste.
- Use a bull float or hand float to smooth out ridges and fill low spots.
- Run an edger along the forms to round the edges.
- Use a groover to cut control joints if needed while the concrete is still plastic.
These steps prepare the surface for the broom finish and help control cracks later.
Step 6: Wait for the Right Brooming Time
Timing is the most important part of broom finish concrete. If you broom too early, the lines will be deep and messy. If you broom too late, the broom will not leave clear texture.
Watch for these signs:
- Most bleed water has evaporated from the surface.
- The surface has firmed up but still marks if you press a finger lightly.
- You can walk on it with minimal sinking, but your footprints do not fill with water.
On a warm, dry day, this might be 30–60 minutes after placing. On a cool, cloudy day, it can take longer. Check the concrete often so you do not miss the window.
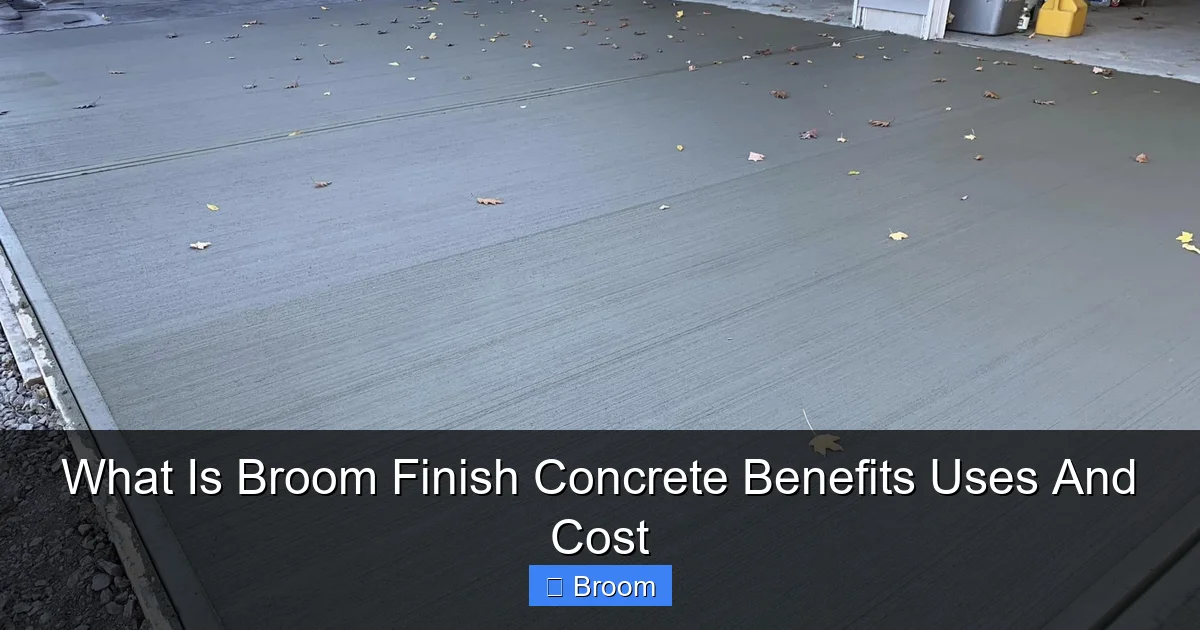
Step 7: Apply the Broom Finish
Now you create the actual broom finish concrete surface.
- Start at one edge of the slab.
- Hold the broom so the bristles just touch the surface.
- Pull the broom in one steady motion across the slab.
- Overlap each pass slightly to avoid gaps.
- Keep your strokes straight and consistent.
You can run the broom perpendicular to the main direction of traffic for better grip. For example, on a driveway, broom across the width, not along the length, so tires cross the lines.
If you are not happy with the first pass and the concrete is still workable, you can lightly trowel and re-broom. But avoid overworking the surface.
Step 8: Cure the Concrete Properly
Good curing is vital for strong, durable broom finish concrete. Curing means keeping the concrete moist and at a stable temperature while it gains strength.
Common curing methods include:
- Misting the surface with water and covering with plastic sheeting.
- Using curing blankets in cooler weather.
- Applying a curing compound or cure-and-seal product.
Follow the product instructions or your contractor’s guidance. Curing usually lasts at least 3–7 days. Avoid heavy use, driving, or dragging heavy items over the new broom finish concrete during this time.
Cost of Broom Finish Concrete
The cost of broom finish concrete depends on your location, slab thickness, site conditions, and whether you hire a contractor or do it yourself. But you can use these general guidelines.
Typical Price Range
In many areas, broom finish concrete costs less per square foot than decorative options like stamped or exposed aggregate. You are usually paying for:
- Concrete material (mix and delivery)
- Base preparation and forms
- Labor for placing, finishing, and curing
- Optional sealer after curing
Broom finish is often considered the “standard” finish, so it is usually the starting price when you get quotes. Decorative upgrades add to that base cost.
Factors That Affect Cost
- Slab thickness: Thicker slabs use more concrete and cost more.
- Site access: Hard-to-reach areas may increase labor time.
- Base work: Poor soil or slopes may need extra excavation or gravel.
- Reinforcement: Rebar or wire mesh adds material and labor costs.
- Color or borders: Colored concrete or decorative bands raise the price.
For small DIY projects, you can save on labor, but you will spend more time and effort. For large driveways or patios, most people hire a professional to ensure the broom finish concrete is done right the first time.
Maintenance Tips for Broom Finish Concrete
Once your broom finish concrete is installed, good care will help it last longer and look better.
Regular Cleaning
Keep the surface clean by:
- Hosing it down every so often to remove dust and debris.
- Using a mild detergent and a brush for stains or spills.
- Avoiding harsh chemicals that can damage the surface or sealer.
The texture of broom finish concrete helps hide light dirt, but regular cleaning reduces staining.
Sealing the Surface
Sealing broom finish concrete protects it from water, de-icing salts, oil, and stains. Many experts recommend sealing every 2–3 years, depending on climate and use.
- Use a sealer designed for exterior concrete.
- Apply only to clean, dry concrete.
- Follow the label for number of coats and drying time.
Some sealers add a slight sheen, while others keep a more natural look. Choose one that matches your preference.
Preventing Damage
To keep broom finish concrete in good shape:
- Avoid using metal shovels that can chip the surface.
- Use plastic shovels or snow blowers with skids set to avoid scraping.
- Limit heavy point loads, like jack stands or very heavy equipment, on thin slabs.
- Fill small cracks early to keep water out.
Troubleshooting Common Broom Finish Concrete Problems
Even with good planning, issues can appear. Here are some common problems with broom finish concrete and what causes them.
Lines Too Deep or Rough
If the broom lines are very deep or the surface looks torn, the brooming was probably done too early while the concrete was still very soft. Using a broom with very stiff bristles can also cause this problem.
To avoid it, wait until the surface firms up and test a small area first. Use a broom made for finishing concrete, not a stiff shop broom.
Weak or Faint Texture
If the broom marks are very light or almost invisible, the brooming was done too late. The concrete had already started to harden, so the broom could not cut into the surface.
Watch the concrete more closely next time and start brooming as soon as bleed water is gone and the surface supports light pressure without sinking.
Surface Flaking or Scaling
Flaking or scaling happens when the top layer of concrete peels away. This can be caused by:
- Finishing while bleed water is still on the surface.
- Using too much water in the mix or on top while finishing.
- Freeze-thaw cycles and de-icing salts on poorly cured concrete.
Proper mix design, good curing, and careful finishing reduce this risk. Sealing also helps protect broom finish concrete in harsh climates.
Random Cracks
All concrete can crack. But good planning can control where most cracks appear.
- Install control joints at proper spacing (often 8–12 feet apart, depending on slab thickness).
- Make sure the base is well compacted and even.
- Avoid sudden heavy loads on new concrete.
Hairline cracks are common and often only cosmetic, especially on broom finish concrete where the texture helps hide them.
Is Broom Finish Concrete Right for You?
Broom finish concrete is a smart choice if you want a surface that is safe, strong, and affordable. It may not have the high-end look of stamped or polished concrete, but it delivers excellent performance for the price.
Choose broom finish concrete if you:
- Need good traction for driveways, sidewalks, or pool decks.
- Have a tight budget but still want a clean, finished look.
- Prefer low maintenance surfaces that are easy to clean.
- Want a finish that works well with almost any style of home.
If you like the idea of broom finish concrete but want more style, you can combine it with colored concrete, decorative saw cuts, or stamped borders. This gives you a custom look without the full cost of a fully decorative slab.
Conclusion
Now you know what broom finish concrete is, how it is made, and why it is used in so many outdoor spaces. The simple act of dragging a broom over fresh concrete creates a textured, slip-resistant surface that is safe, durable, and budget-friendly.
Whether you are planning a new driveway, patio, sidewalk, or pool deck, broom finish concrete is worth serious consideration. With proper planning, correct timing, and good curing, it can serve you well for many years with minimal upkeep.
If you are unsure about doing it yourself, talk with a local concrete contractor. Ask them to explain how they will create the broom finish concrete on your project, and use this guide to help you compare options and make the best choice for your home.
🎥 Related Video: Concrete Broom Tool Innovation for Technology in Road Finishing
📺 Innoforge Studio
Concrete Broom Tool Innovation for Technology in Road Finishing Technical specifications of the tool – Roller width: 40–60 cm …